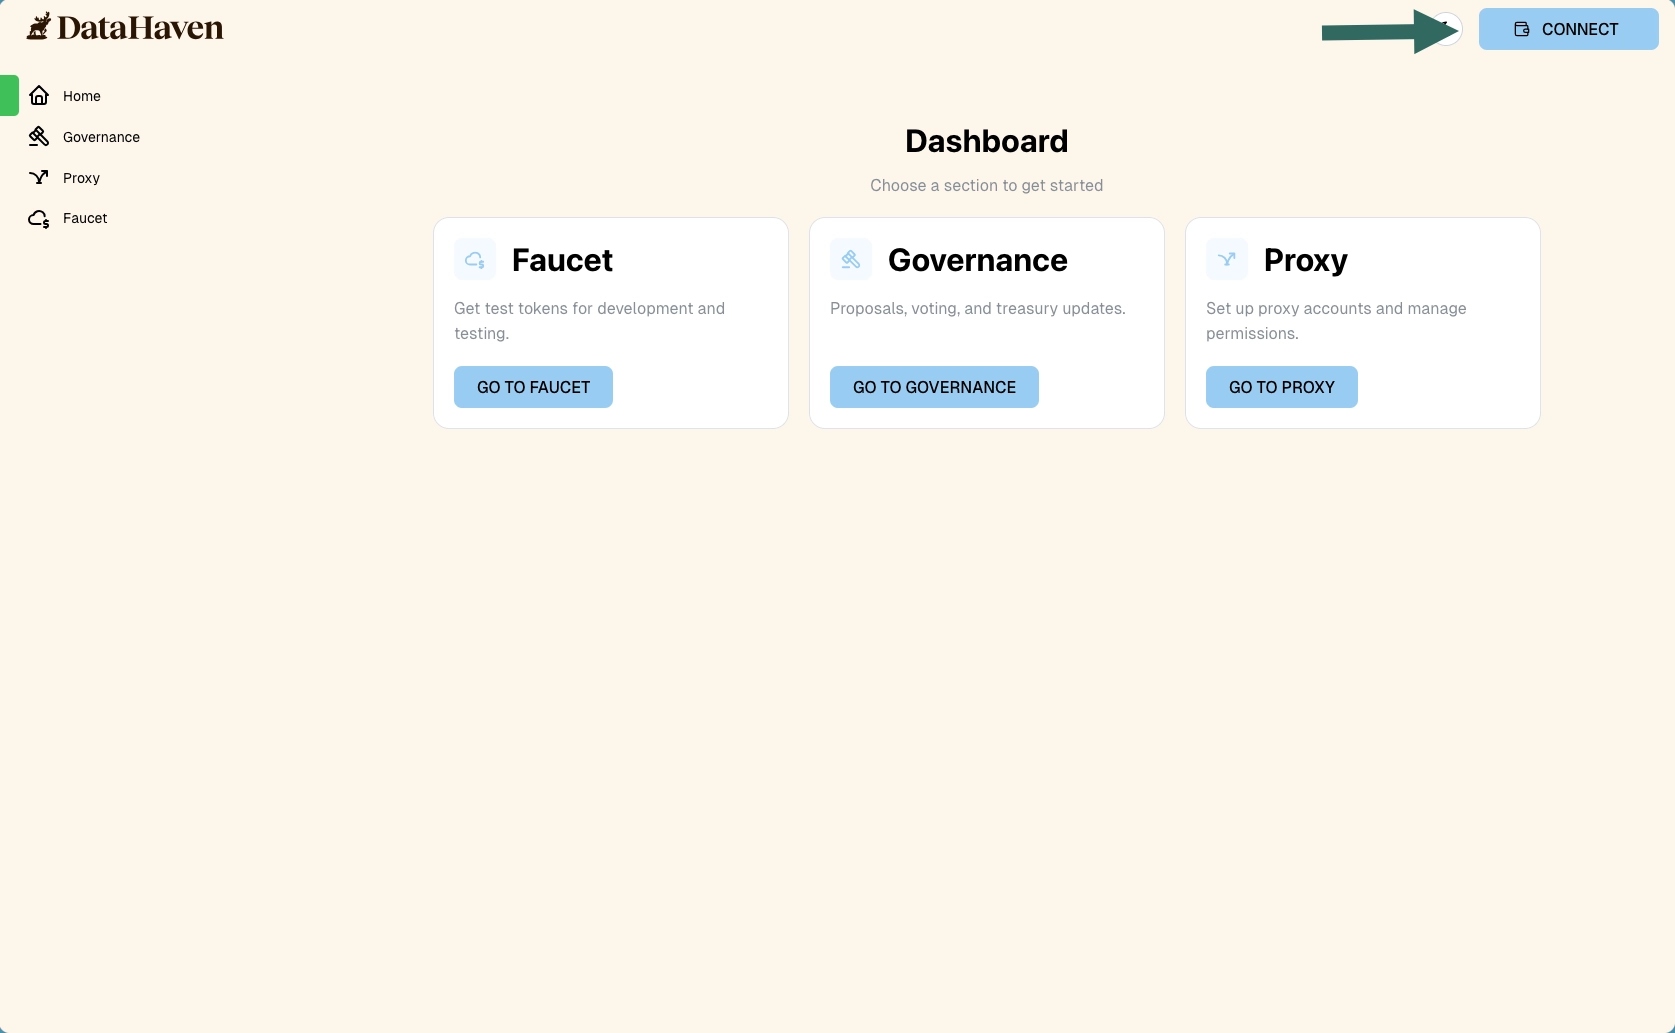
Use the DataHaven dApp
The DataHaven dApp is a convenient front-end for users to interact with the DataHaven network. It guides you through connecting your wallet, creating buckets, and uploading or downloading files without writing any code.
Prerequisites
- DataHaven testnet RPC added to your wallet (see the Testnet page for RPC details; the connection flow below will also prompt you to add it)
- MOCK testnet tokens to cover transactions and storage fees
- DataHaven dApp testnet URL
Connect and Fund Your Wallet
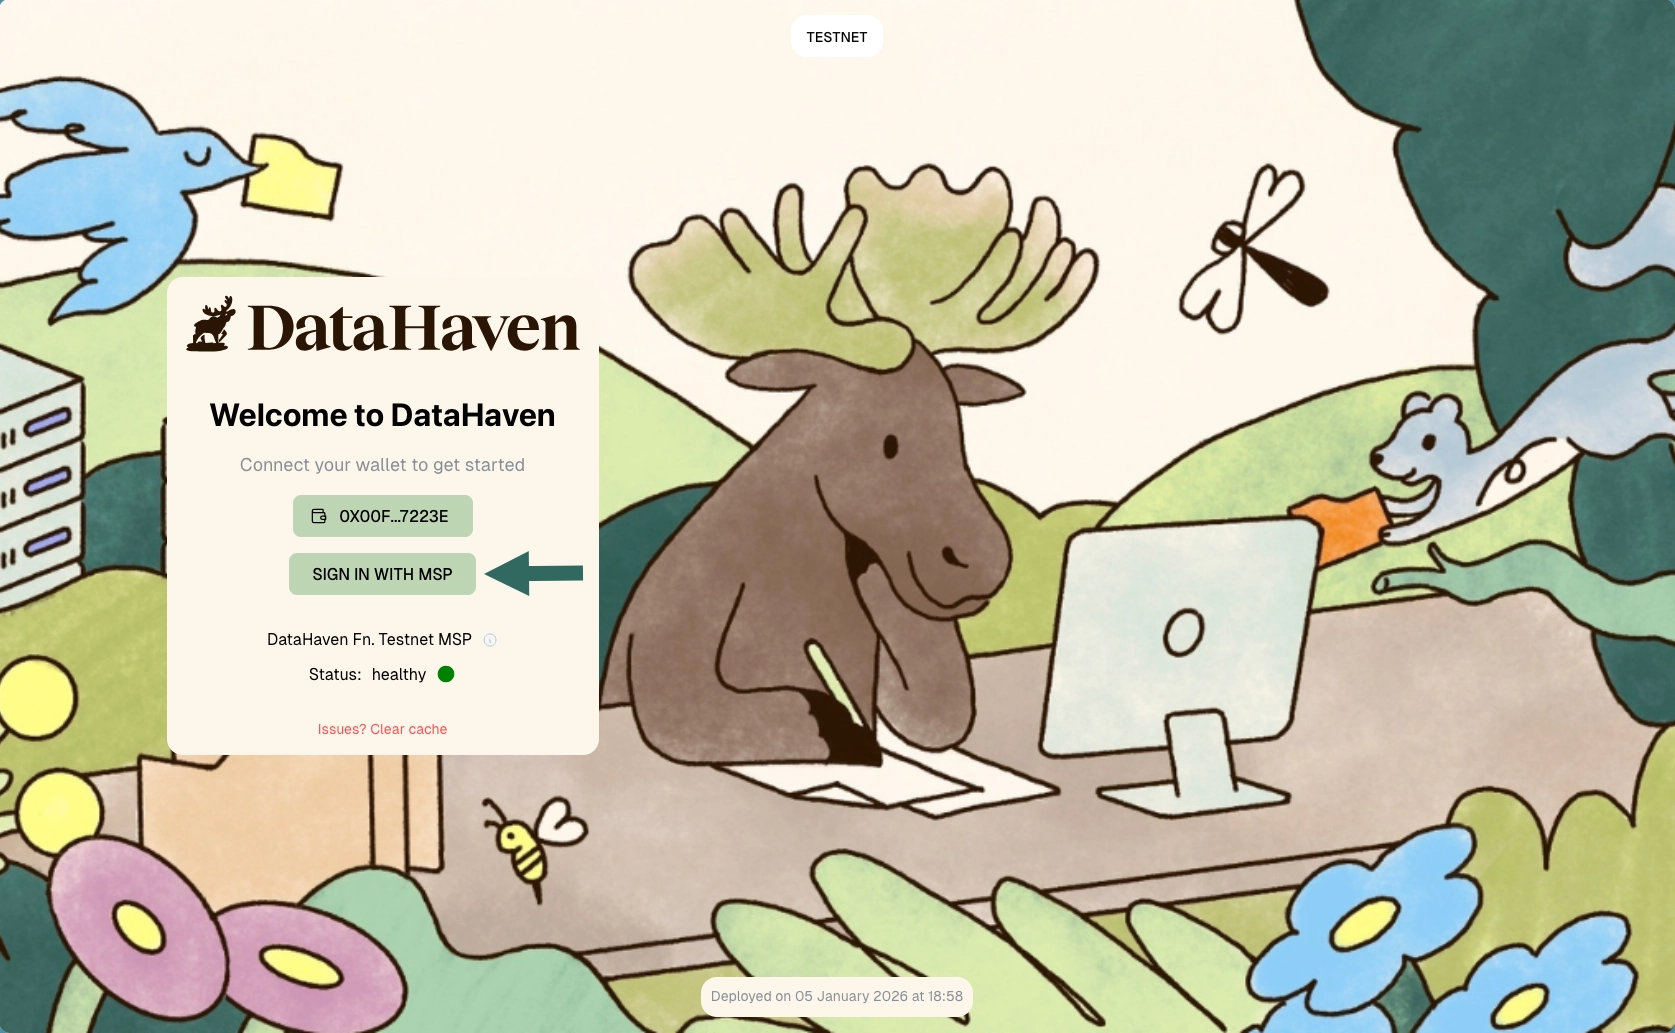
To get started, visit the DataHaven testnet portal and click Connect. When prompted, approve adding the DataHaven testnet RPC to your wallet, then sign the login message to authenticate.
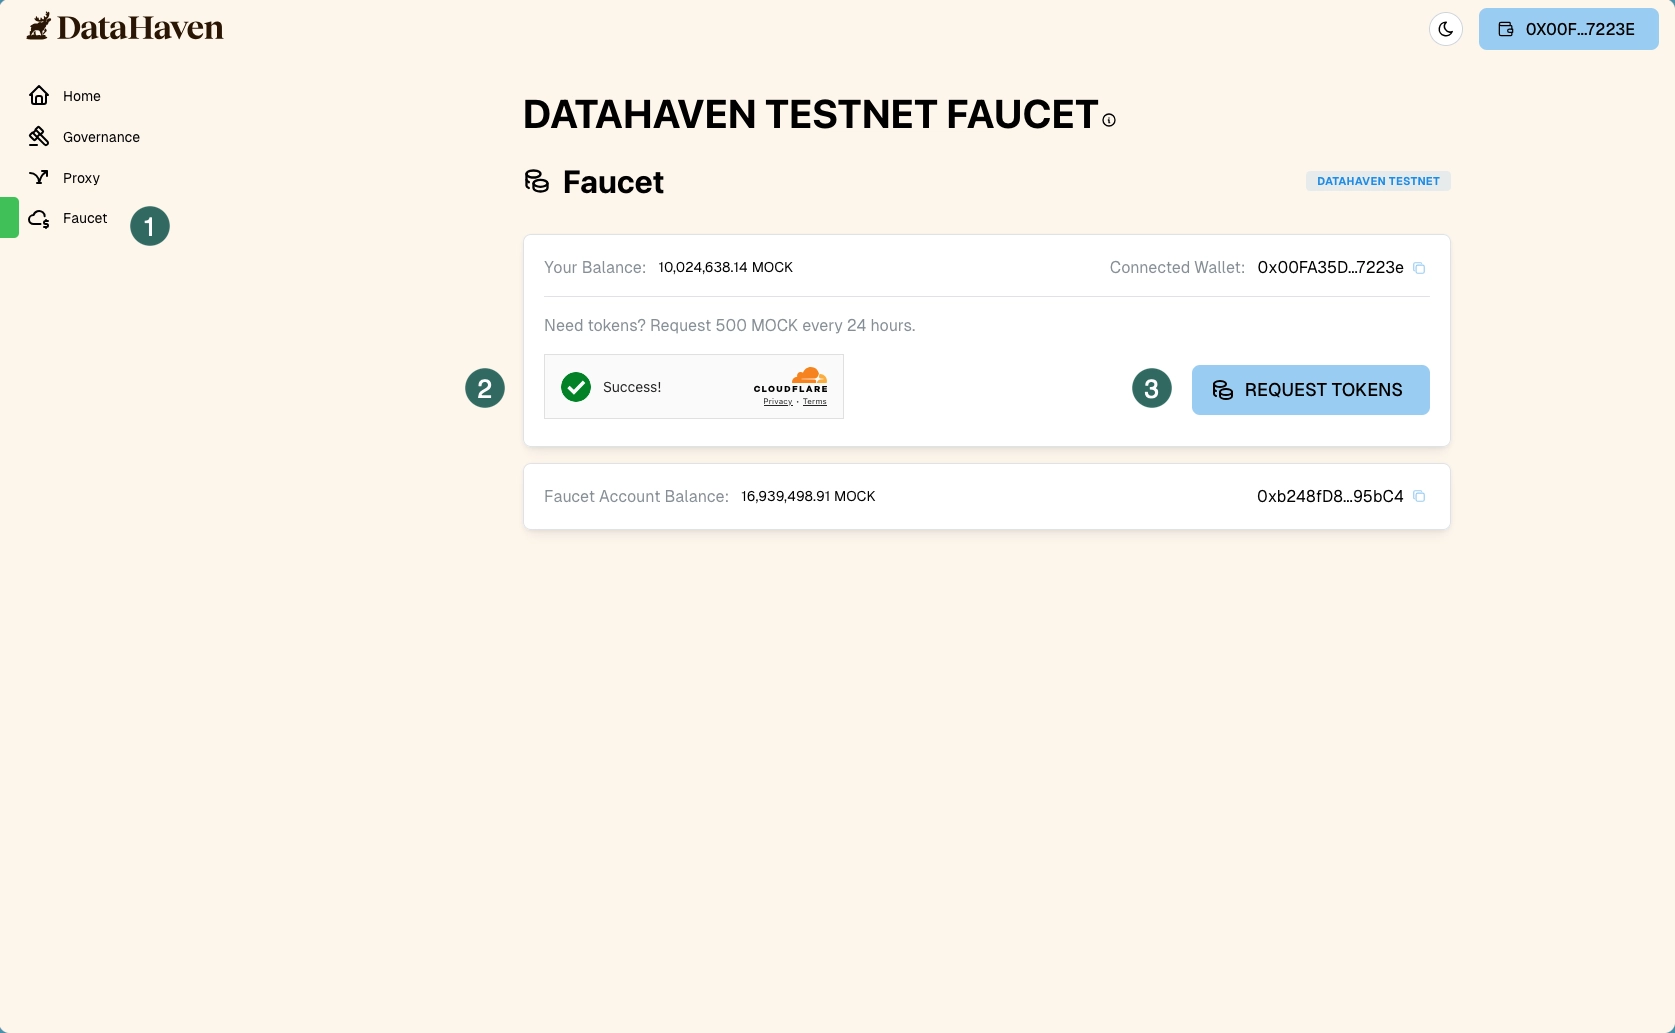
To request tokens:
- Go to the Faucet tab.
- Complete the captcha.
- Click Request tokens to receive MOCK for gas and storage payments.
Connect to DataHaven dApp and Authorize Storage Payments
- Go to the DataHaven dApp on testnet.
- Click Connect wallet and choose your wallet provider, then sign the login message.
- Approve the allowance prompts that appear. DataHaven charges on an ongoing basis for the amount of data you store and the desired replication factor, so these approvals let the dApp deduct storage fees from your testnet balance when you upload files.
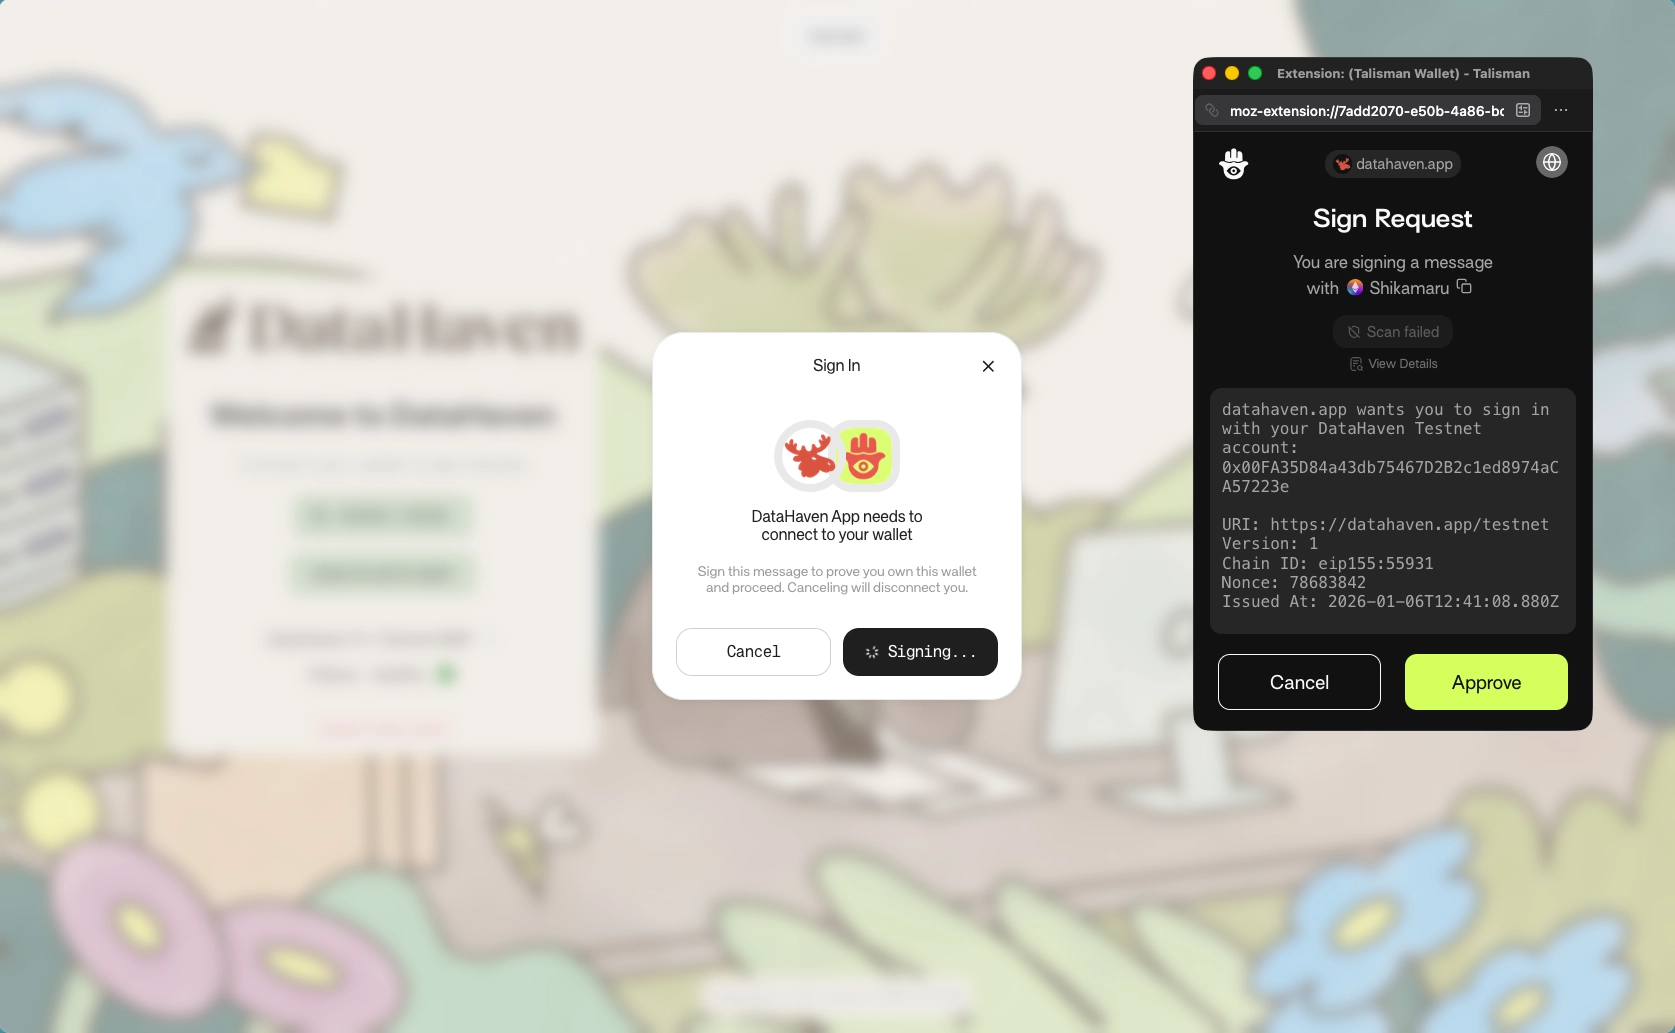
Sign In With MSP
- Click Sign in with MSP.
- Sign the message.
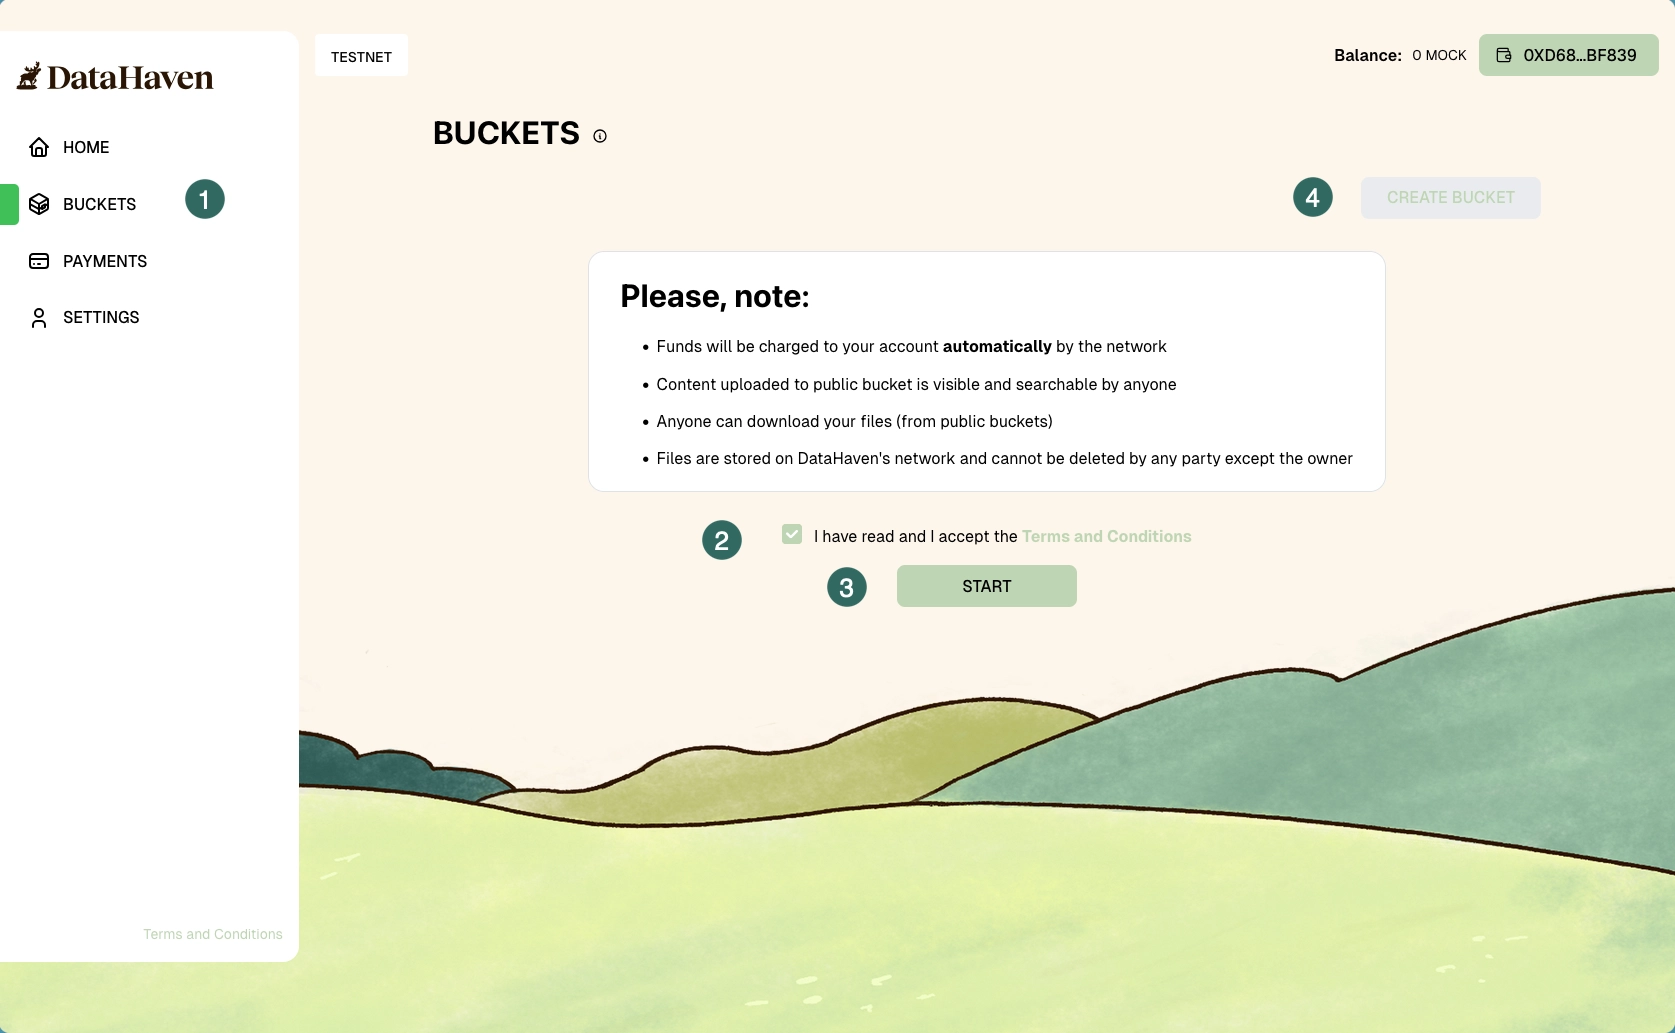
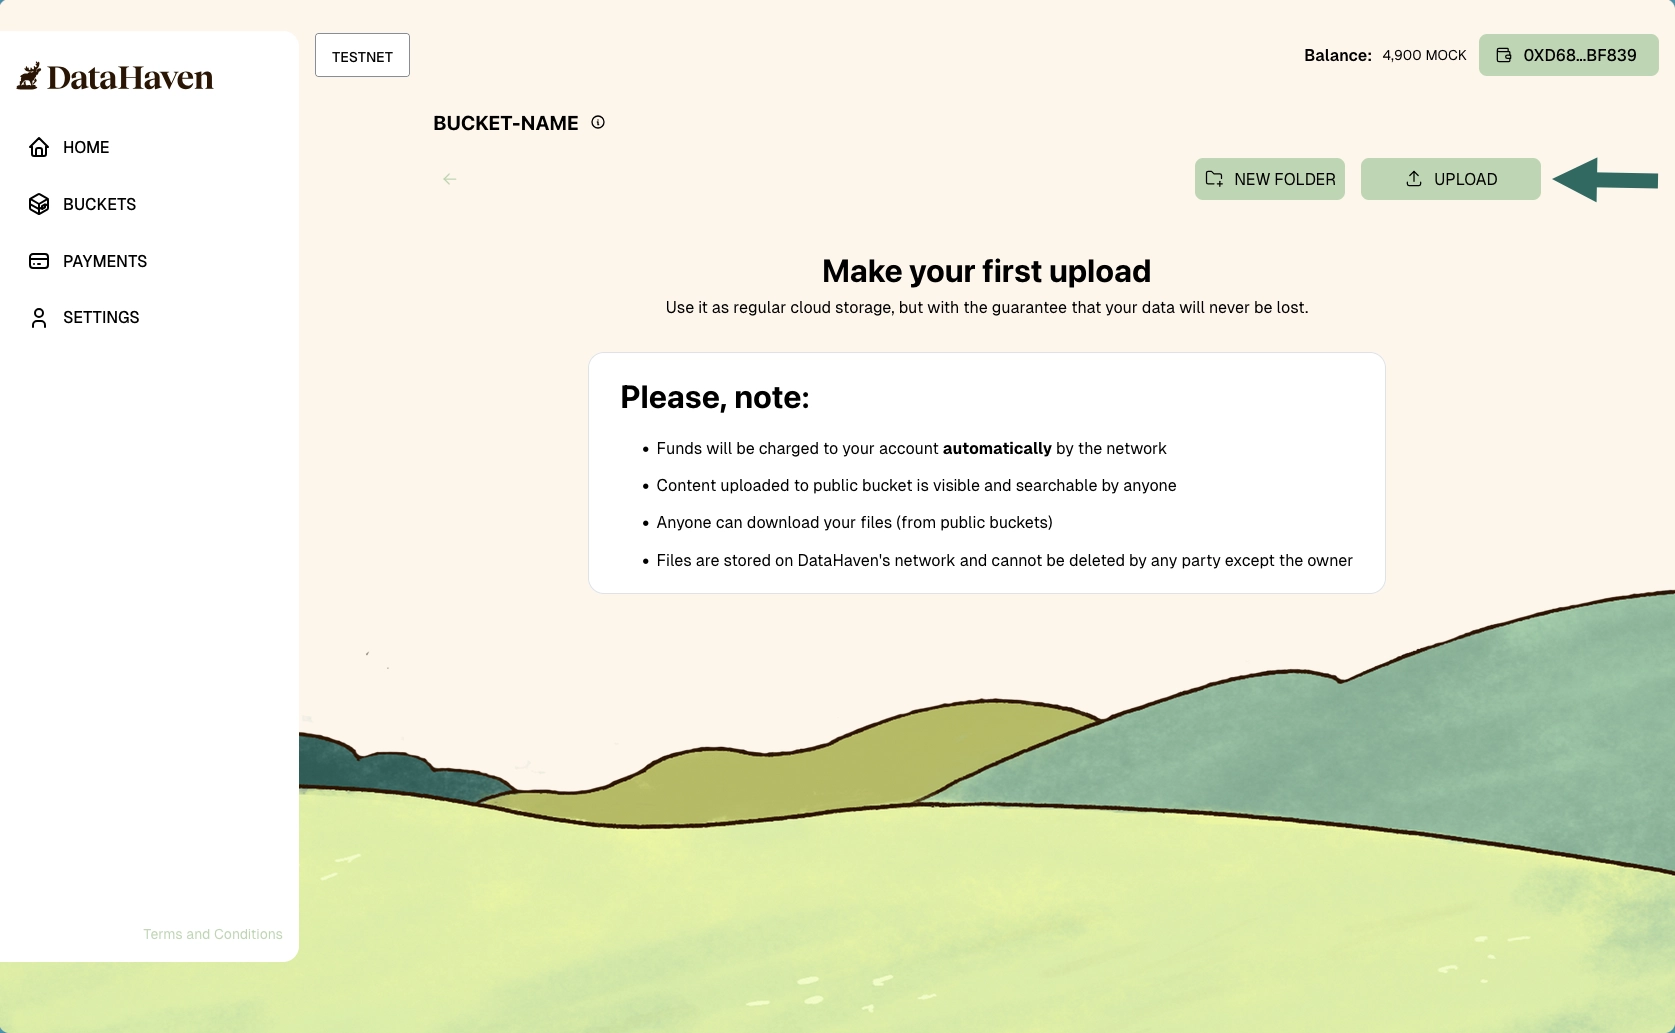
Create a Bucket
- In the DataHaven dApp, open Buckets and review the notice displayed on the page.
- Select the checkbox that you have read and agree to the terms and conditions.
- Press Start.
- Click Create Bucket.
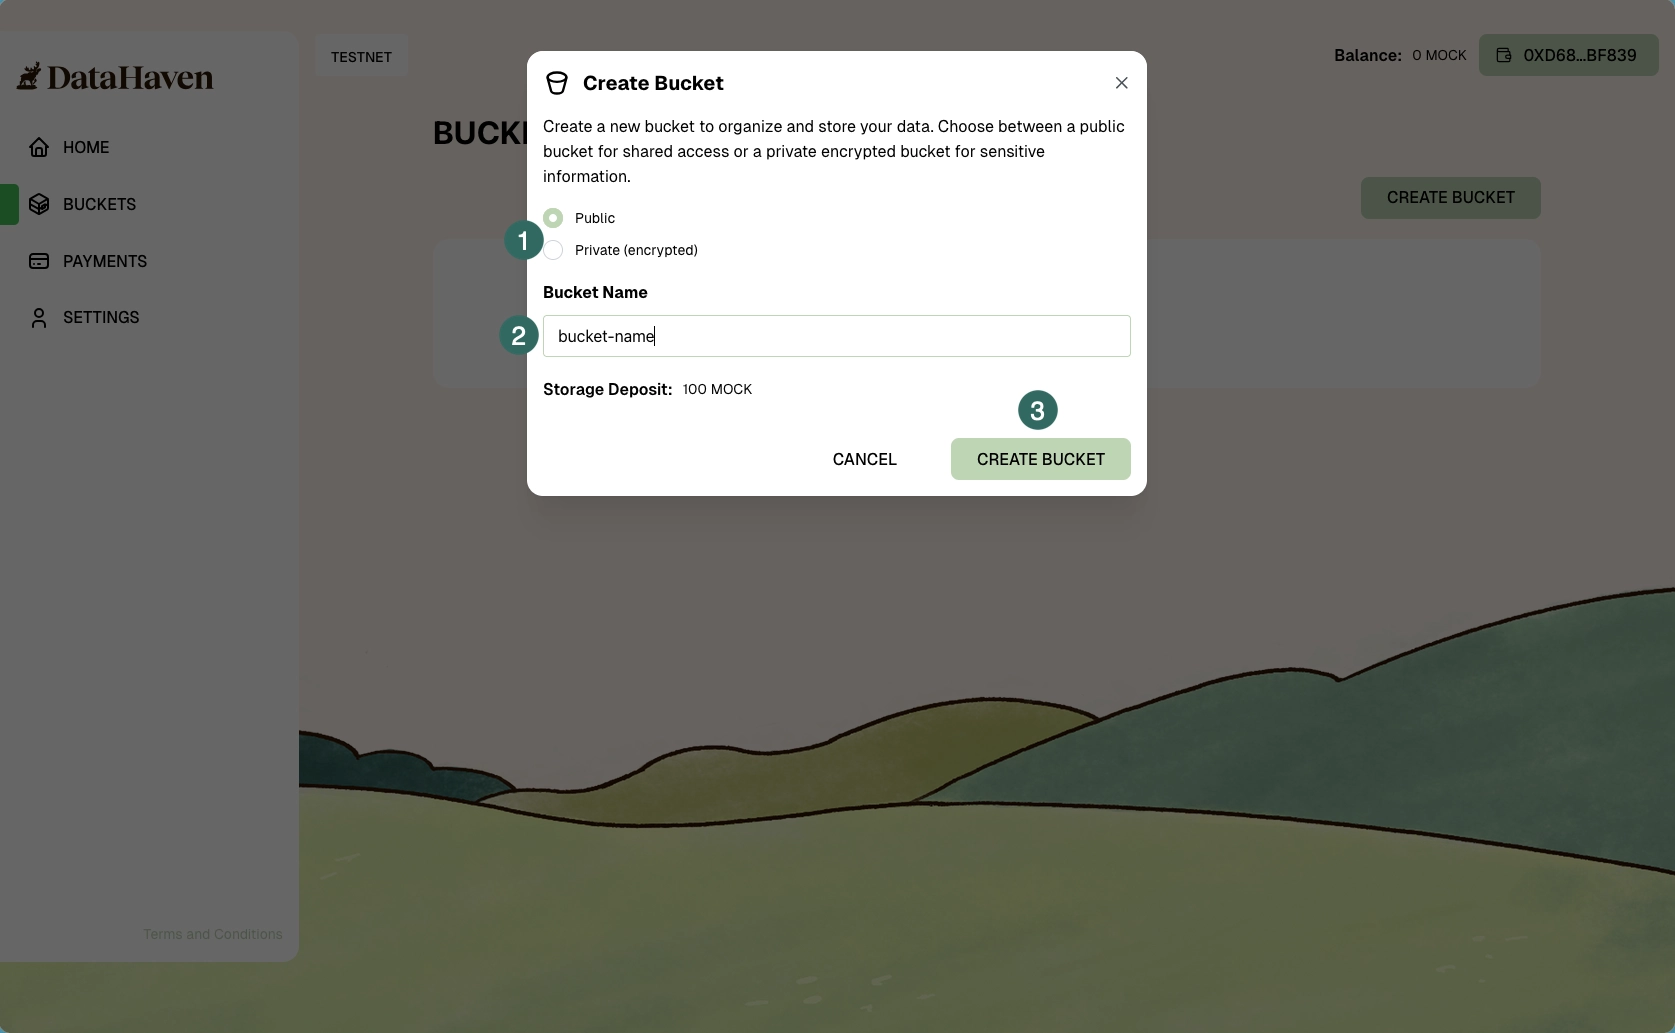
In the pop-up window:
- Choose if the bucket should be private or public.
- Give the bucket a name and press Create Bucket.
-
Click Create Bucket.
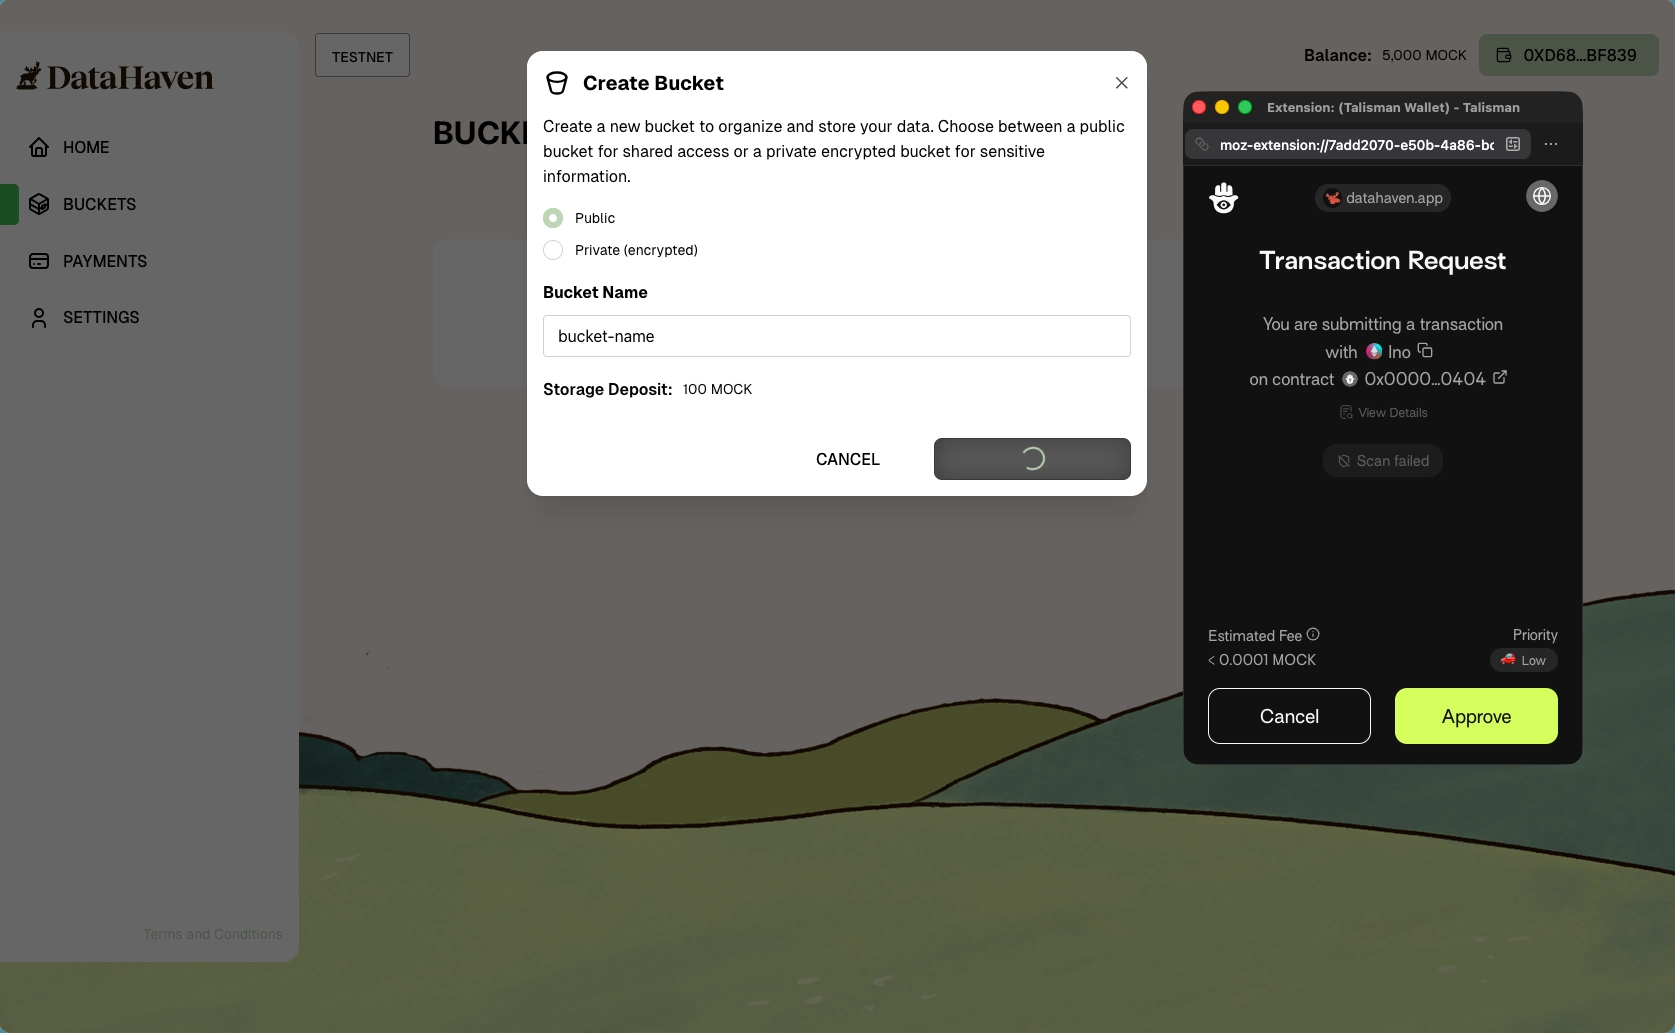
-
Approve the bucket creation transaction in your wallet.
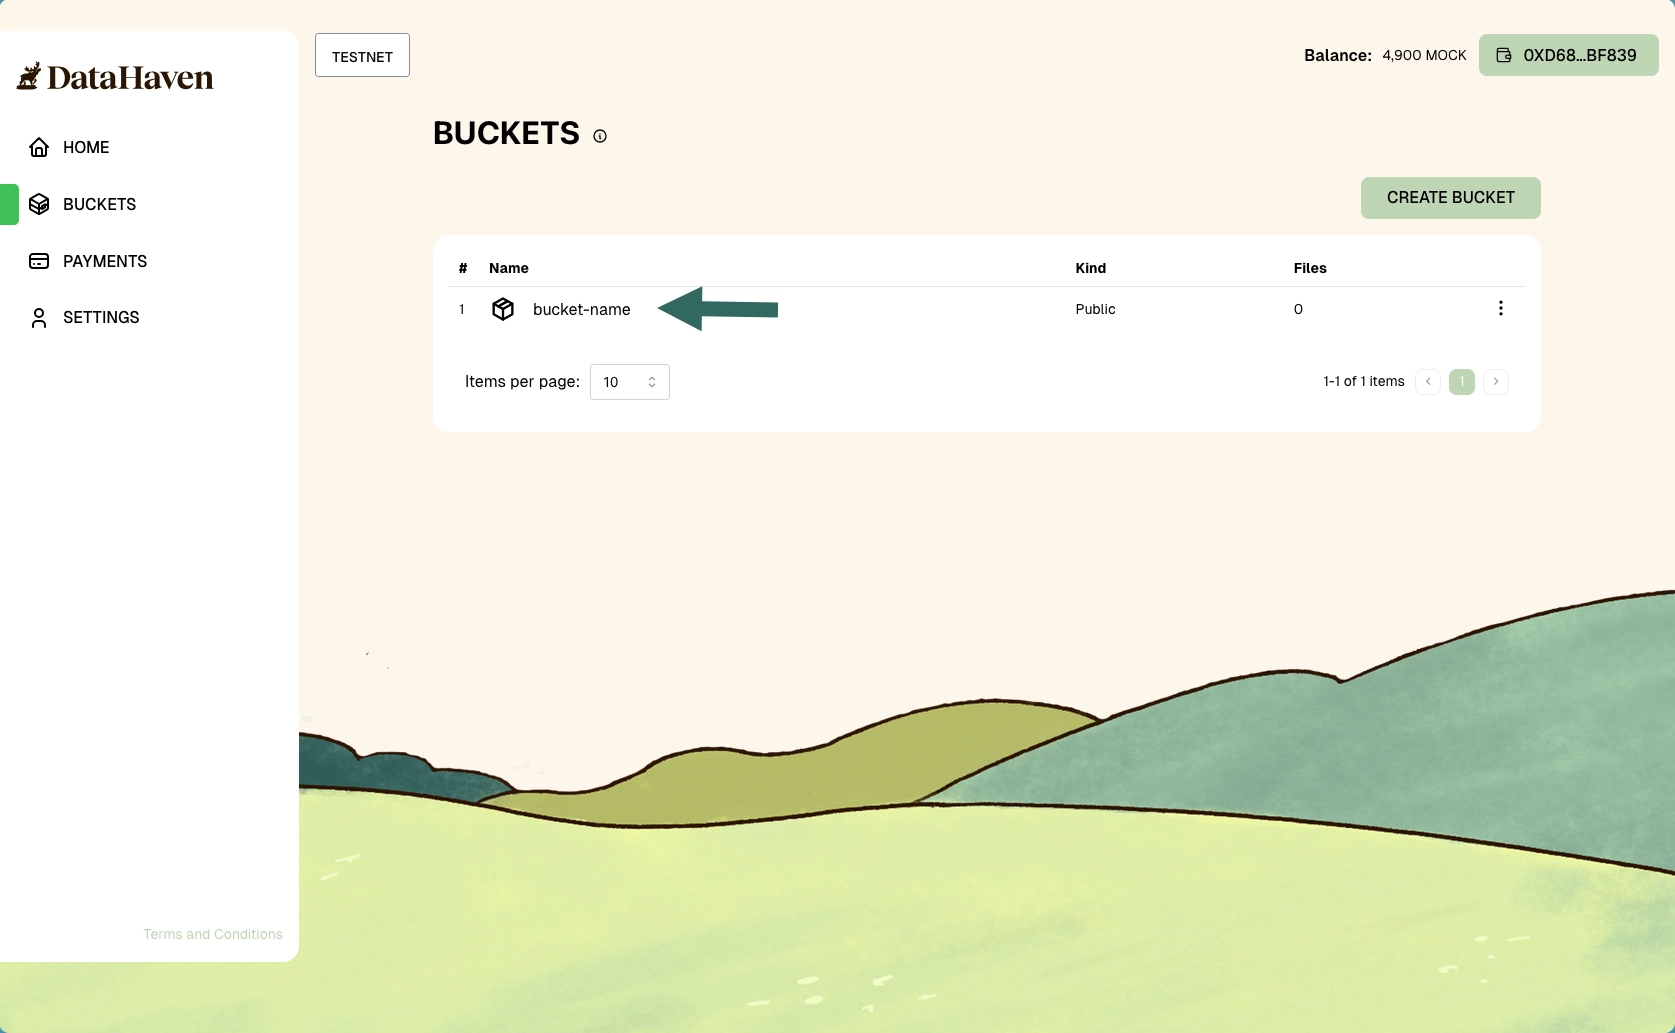
Wait a few moments while the bucket is indexed. Once it appears, you can open it to manage files and folders.
Upload and Download a File
-
Open your bucket and review the notice displayed on the page.
-
Click Upload.
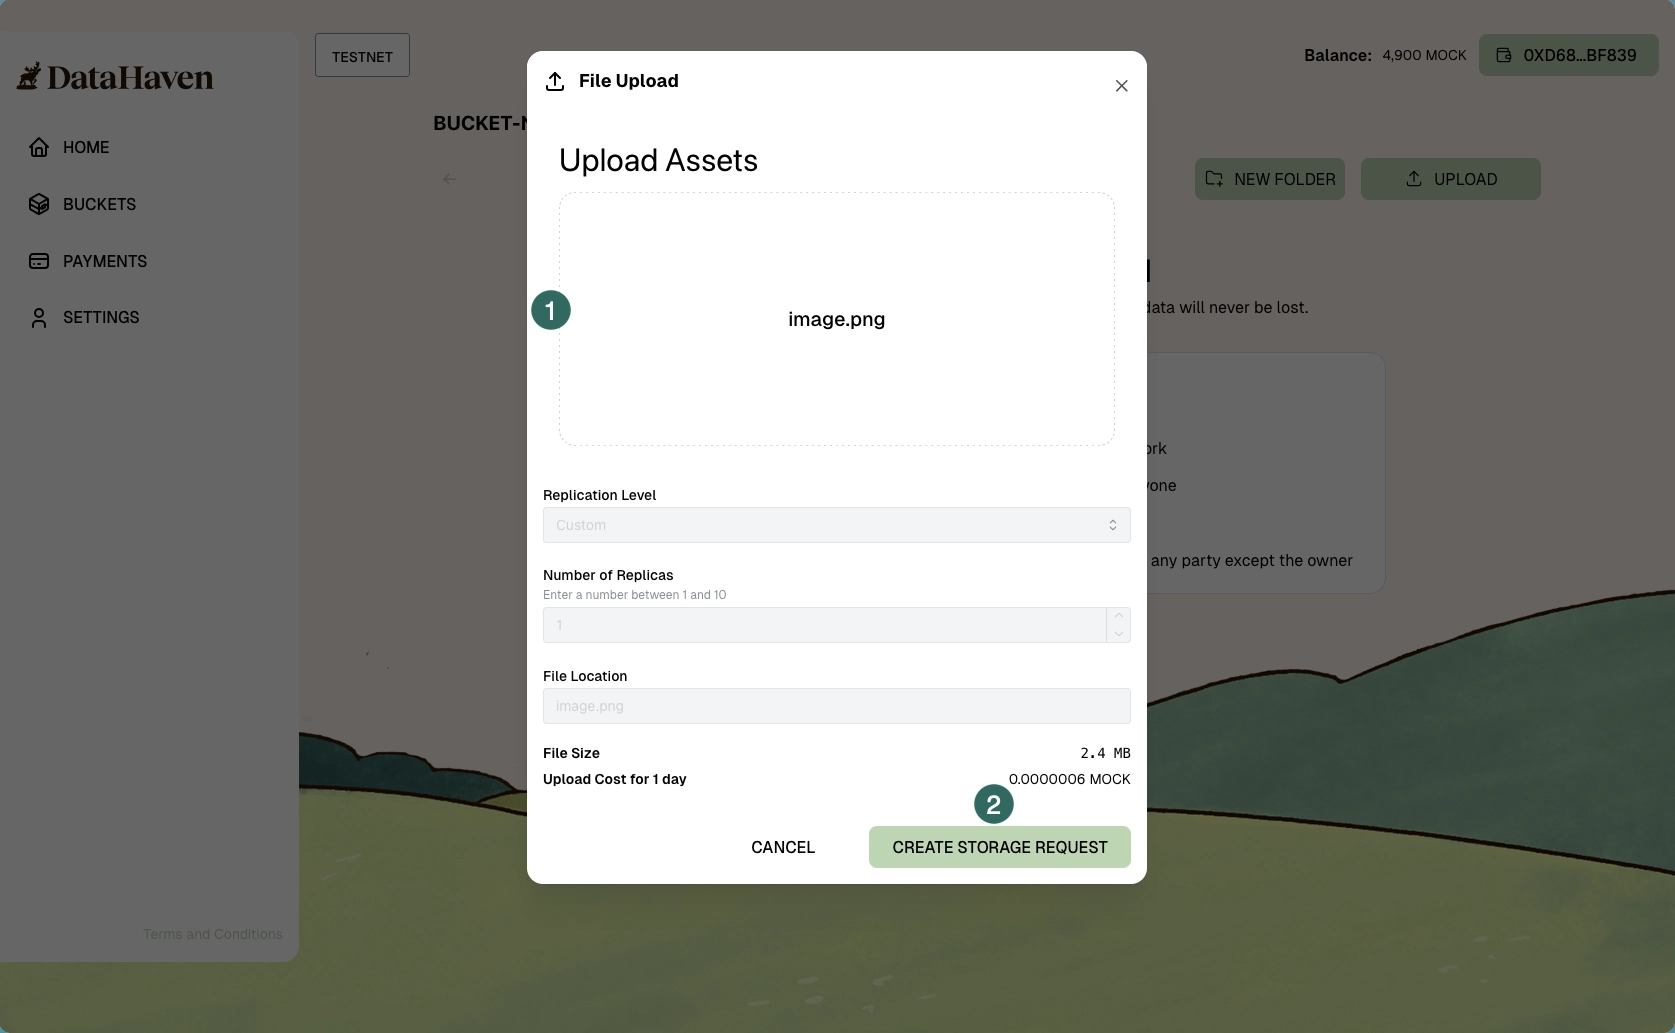
In the pop-up window:
- Choose a file from your computer and leave replication settings as-is (they are fixed in the current release).
-
Click Create Storage Request and approve the transaction to start the upload.
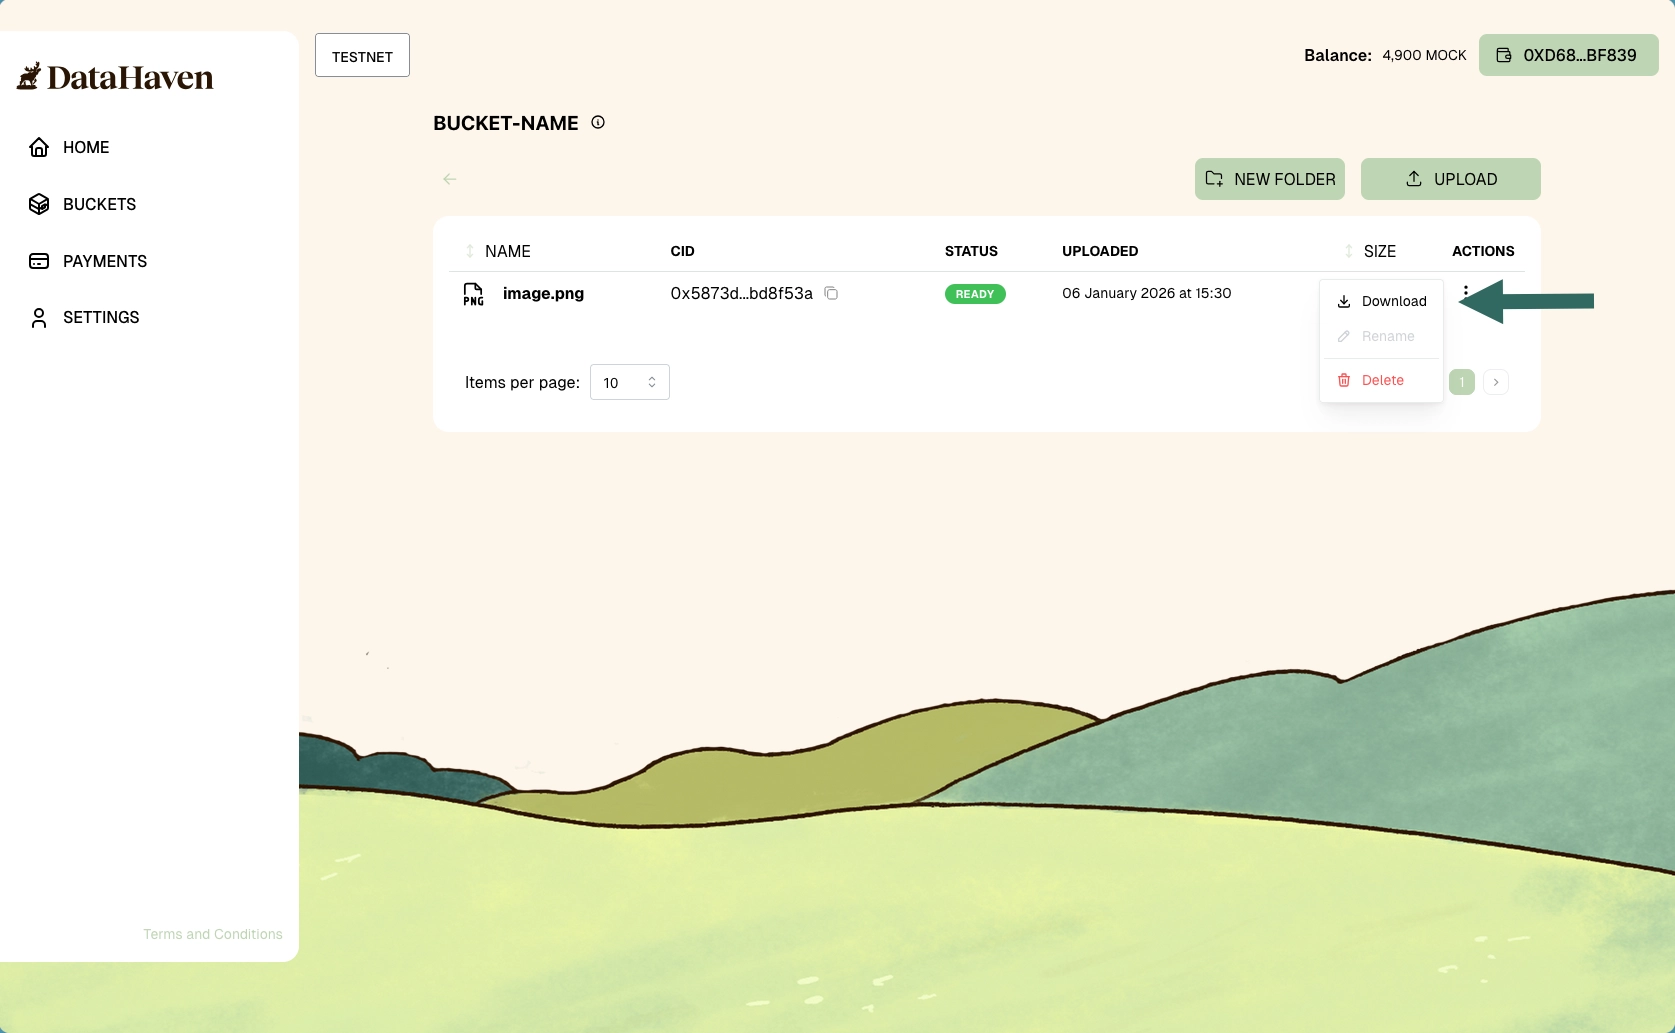
The upload shows In progress while replicas are distributed. You can still click Download during replication. Once replication meets the target, the status switches to Ready.
That’s all you need to store and retrieve files on DataHaven using the DataHaven dApp.
| Created: January 8, 2026