Verify BSP Node via UI
This guide walks you through how to register your Backup Storage Provider (BSP) on-chain and verify it is eligible to participate in the DataHaven network through the Polkadot.js Apps UI.
Prerequisites
- A running BSP node with your BSP's secret/raw seed and your BSP's multiaddress handy.
Deposit Requirements
The formula for the deposit is as follows:
SpMinDeposit + (capacity_in_gib * DepositPerData) + buffer
SpMinDeposit: Base deposit of 100 MOCKcapacity_in_gib: The set GiB capacity of your hardwareDepositPerData: 2 MOCK per GiBbuffer: An additional safety margin
Examples:
- 800 GiB capacity: 100 + (800 × 2) = 1,700 MOCK required (1,800 MOCK recommended)
- 1.6 TiB capacity: 100 + (1,638 × 2) = 3,376 MOCK required (3,500+ MOCK recommended)
The deposit is held (reserved) from your account when you start the BSP registration process and remains held while you operate as a BSP. The deposit is returned when you deregister as a BSP.
Note
Your BSP account must be funded before BSP registration.
Import BSP Account Into Wallet
To proceed with verifying your BSP node, you must have your BSP account funded and ready to sign transactions in your browser.
-
Install in your browser the Talisman wallet if you haven't already.
-
Import into your wallet of choice, the same ECDSA raw seed that you injected into your BSP node's keystore in the Run a BSP Node guide.
-
Fund your account with the required amount of MOCK tokens as defined in the Deposit Requirements section.
Request BSP Sign Up
Trigger the BSP sign-up flow from Polkadot.js Apps to submit the registration request on-chain.
-
On Polkadot.js Apps, open the navbar on the top left, and set your custom
wsUrlWebSocker endpoint. Depending on whether your BSP node is running on a remote Linux server or on your local machine (the same machine where you're accessing the Polkadot.js Apps) you are going to be using a different WebSocket endpoint.Set your custom
wsUrlto bewss://services.datahaven-testnet.network/testnet.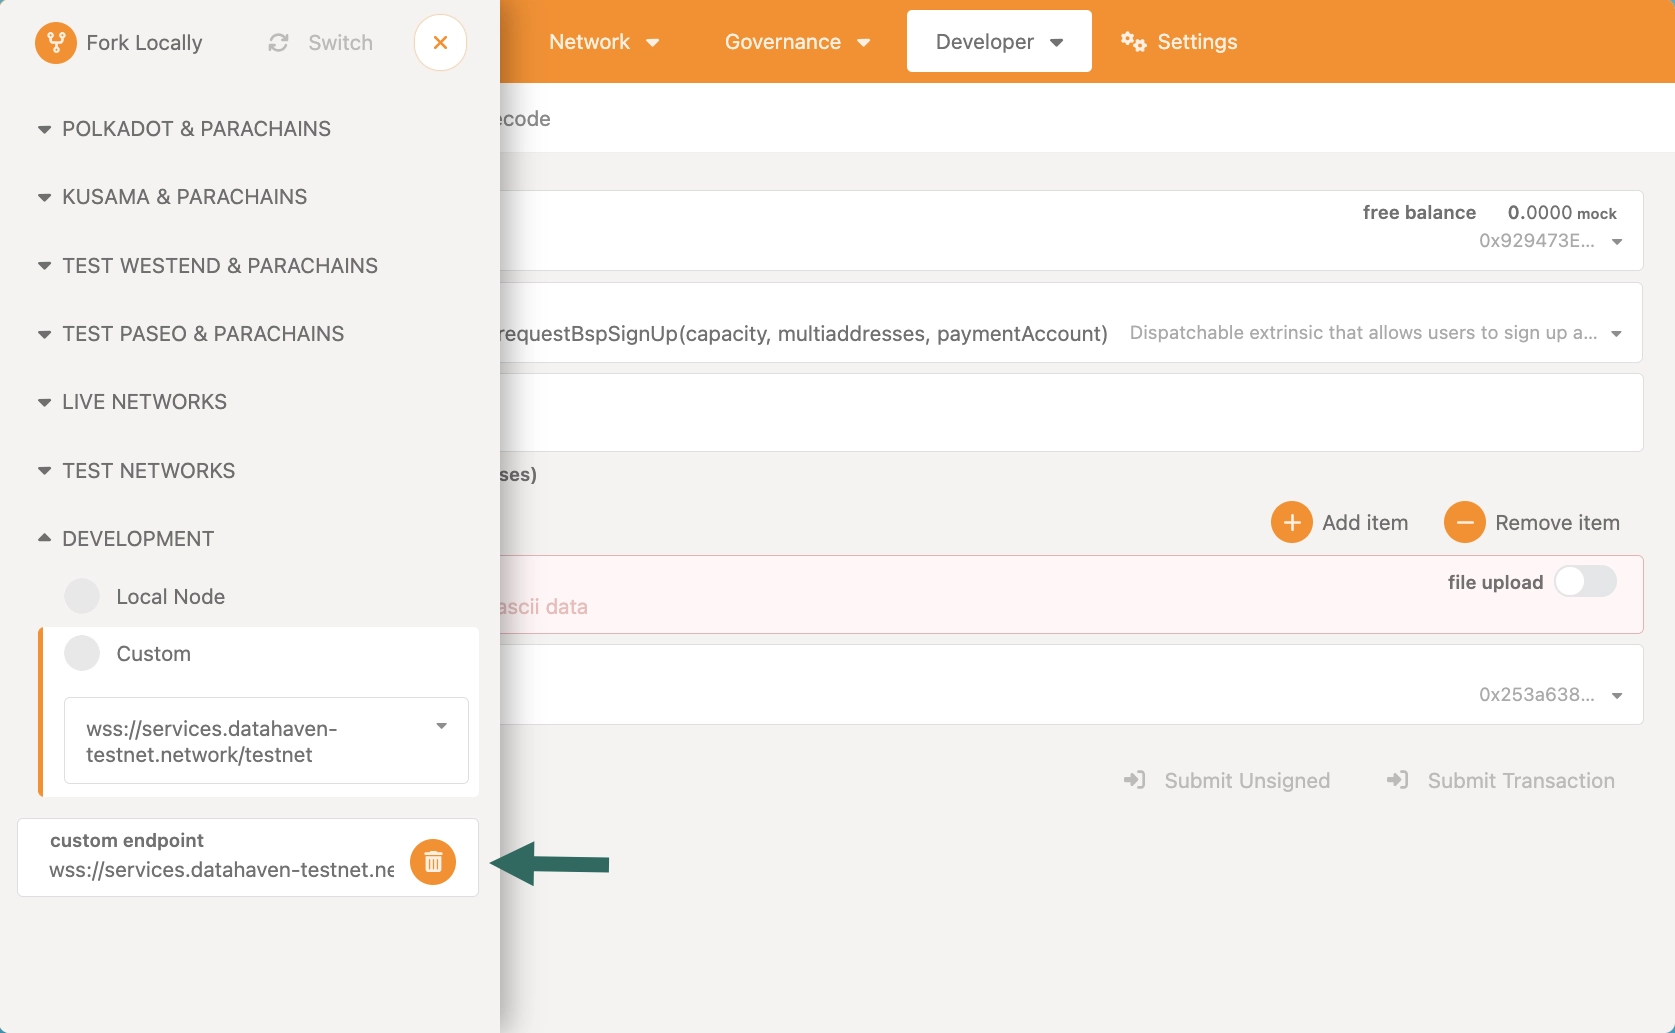
Set your custom
wsUrlto bews://127.0.0.1:9946. You should use the port number9946because that is the port number you should have defined in yourdocker-compose.ymlfile when going through the Run a BSP Node guide.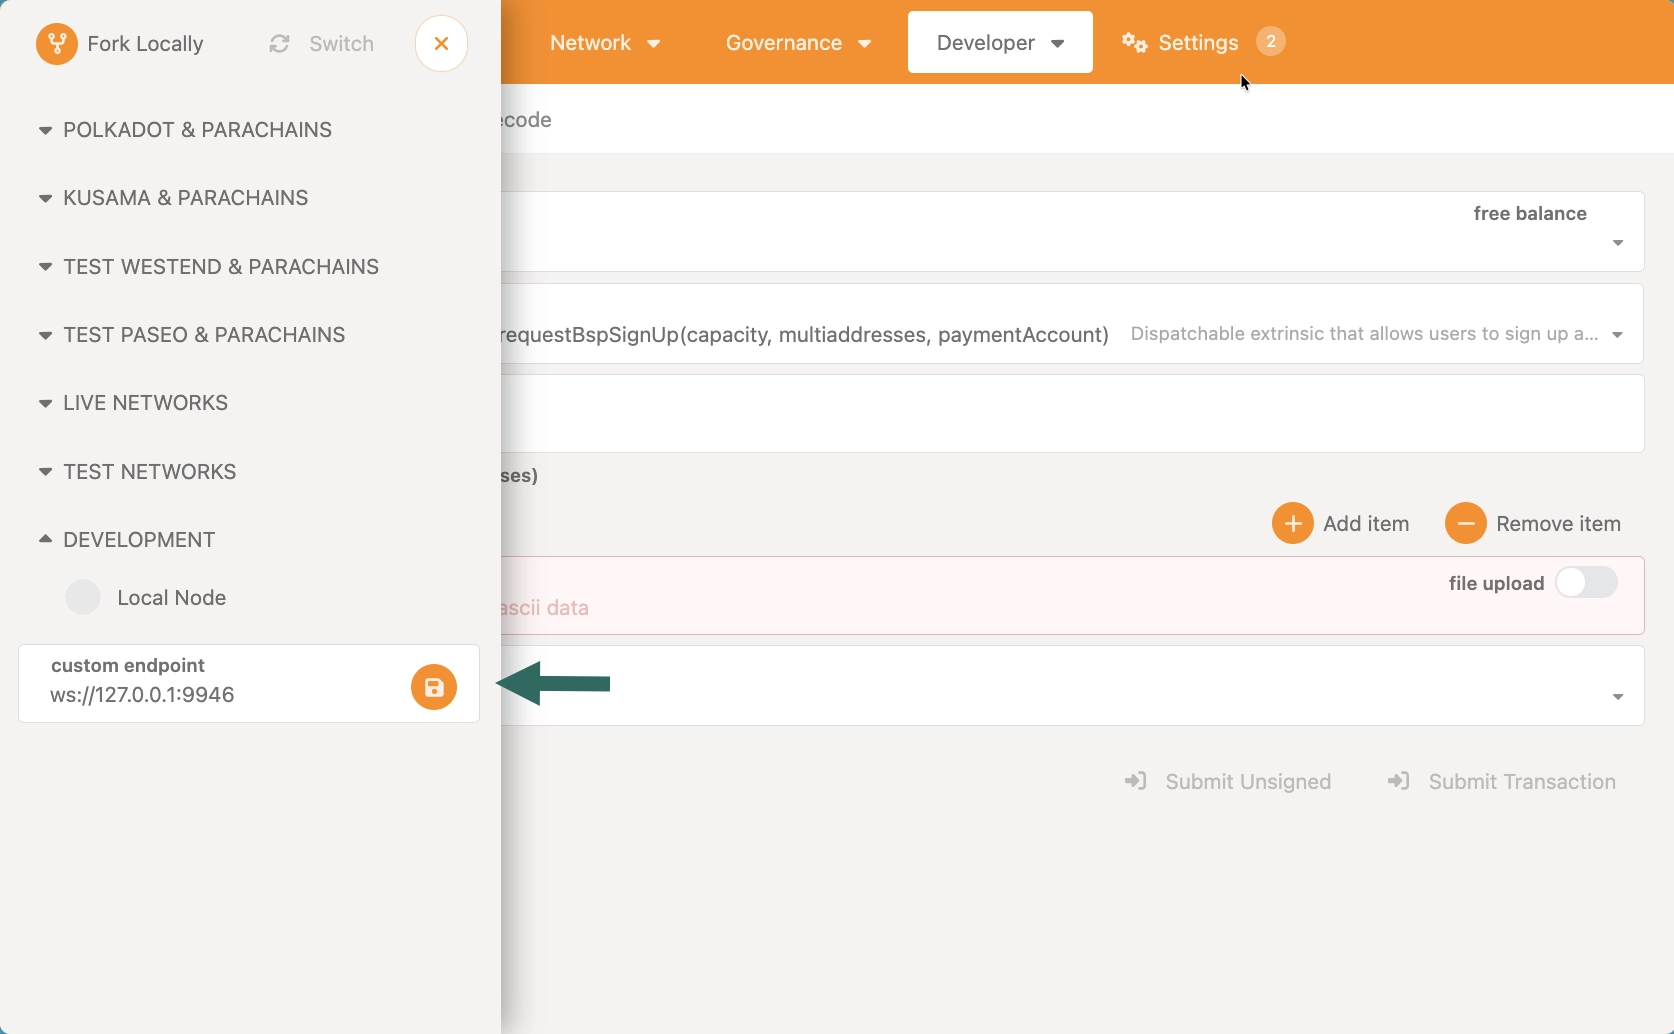
-
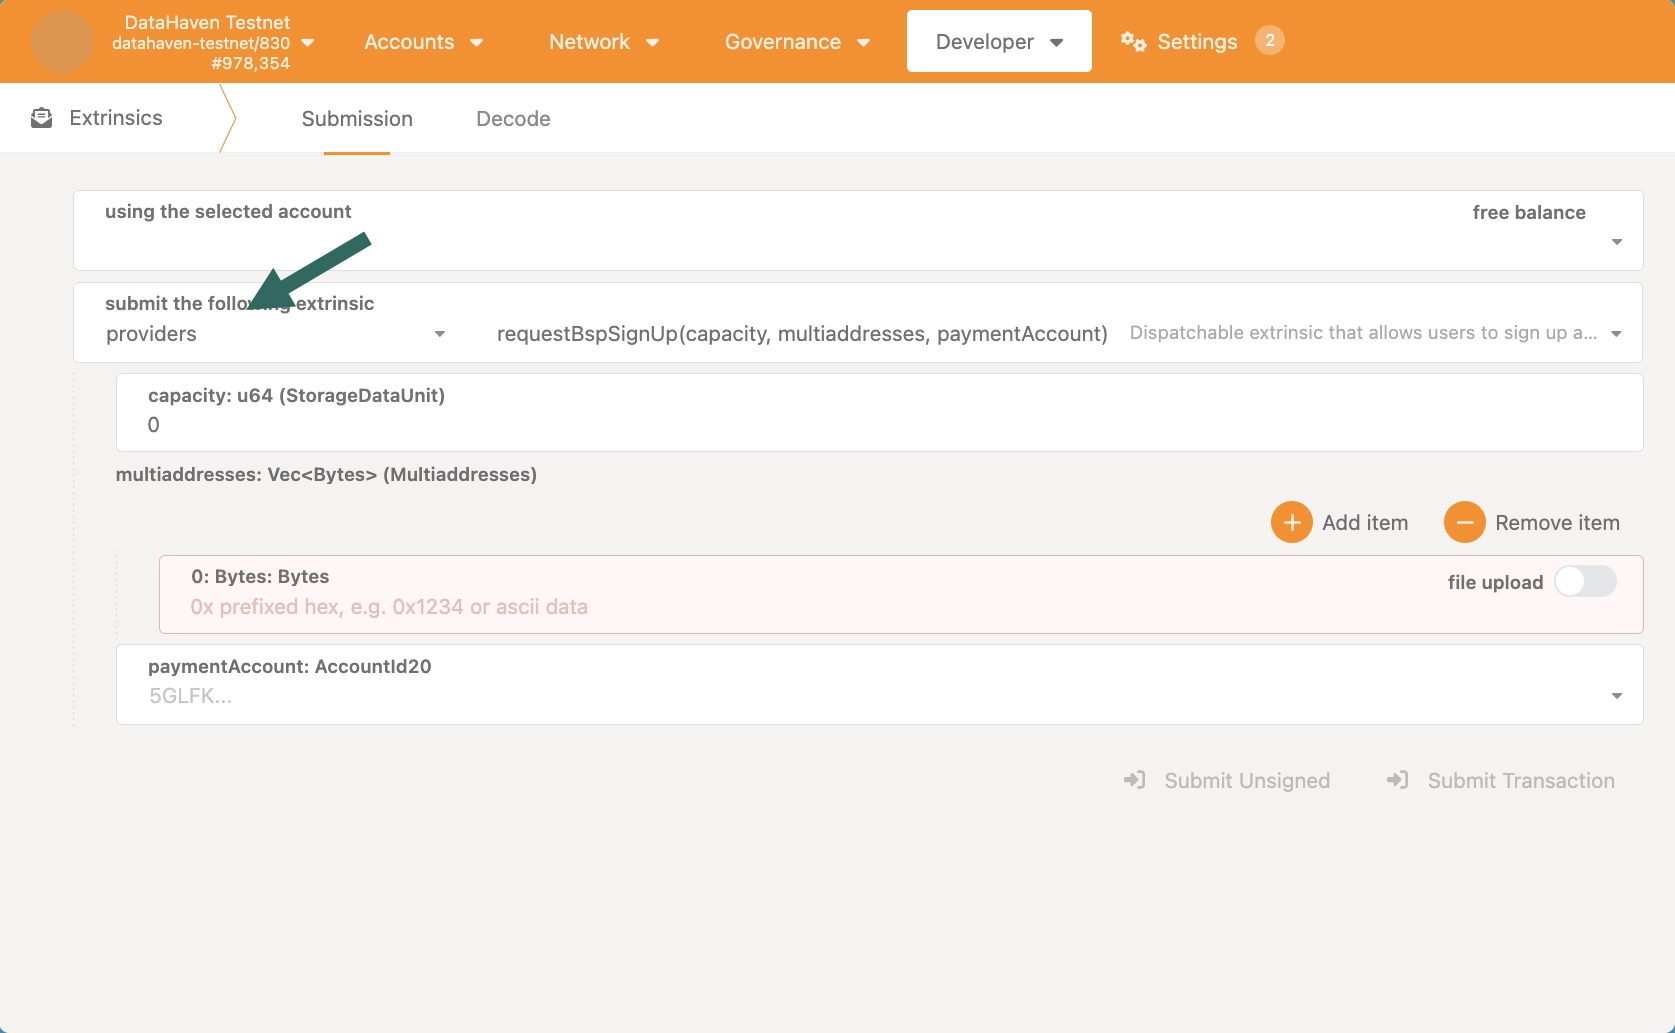
Within the Developer section, go to the Extrinsics page, and select the
providers.requestBspSignUpextrinsic.Three parameters are required to execute this extrinsic:
-
capacitymultiaddressespaymentAccount
-
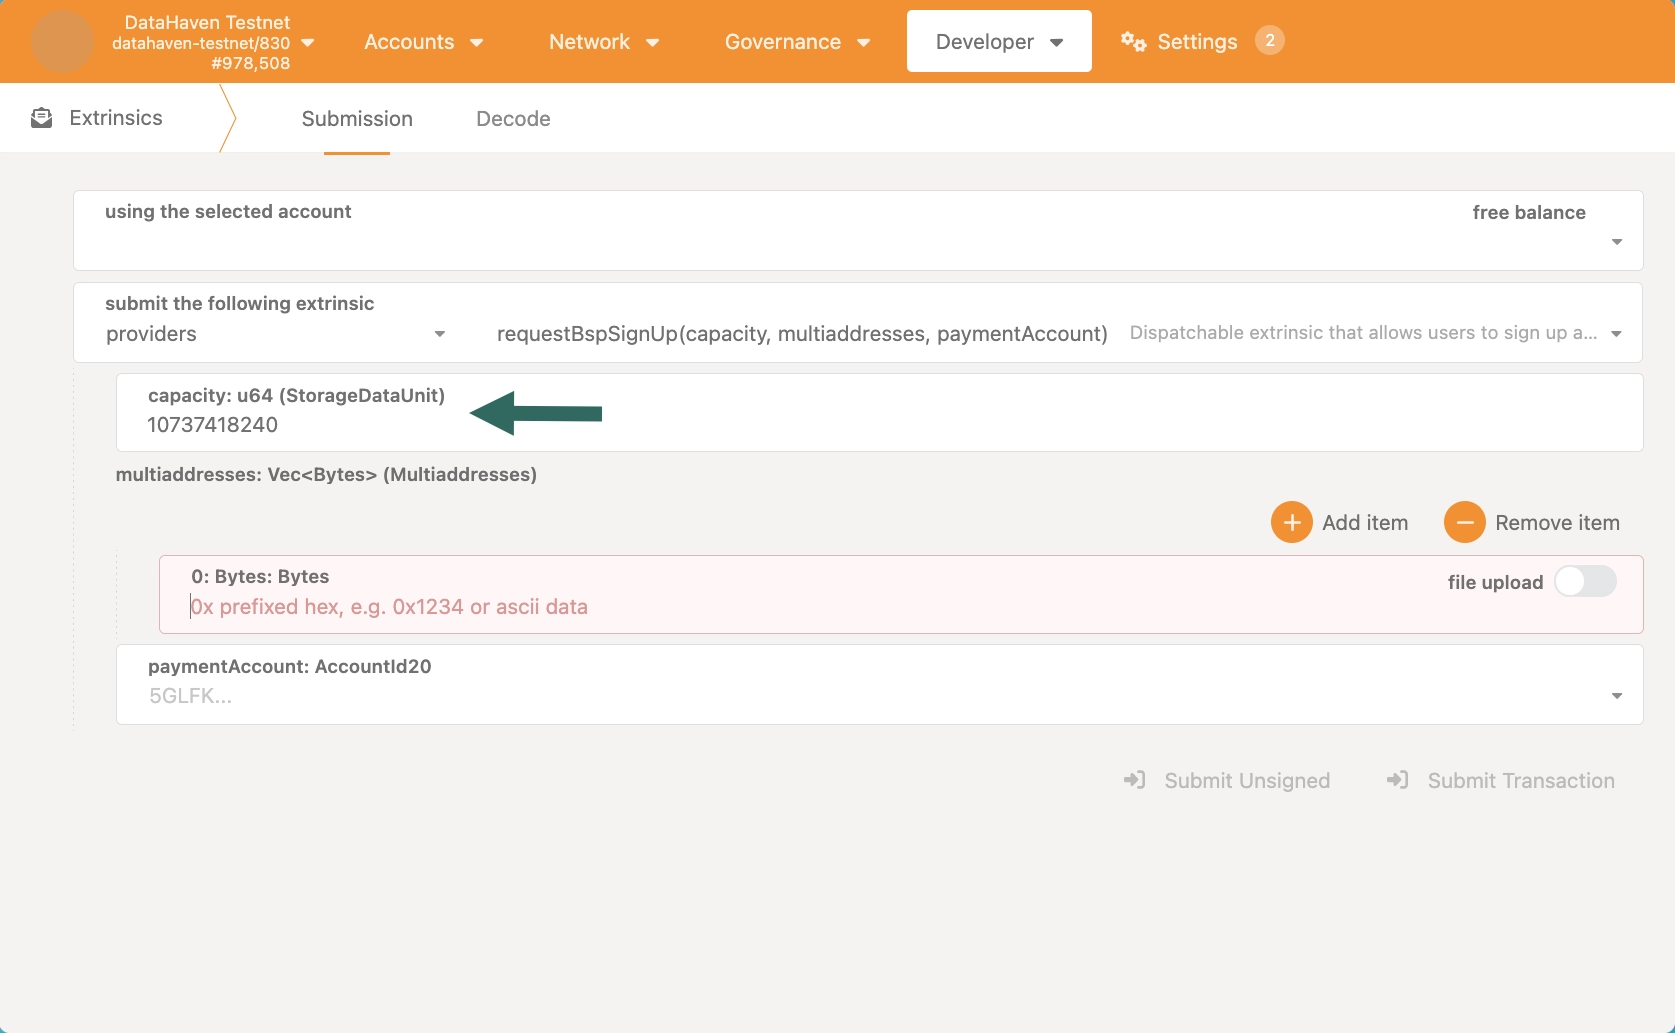
Set capacity based on your machine's capabilities and the hardware requirements provided in the "Run a BSP Node" guide.
-
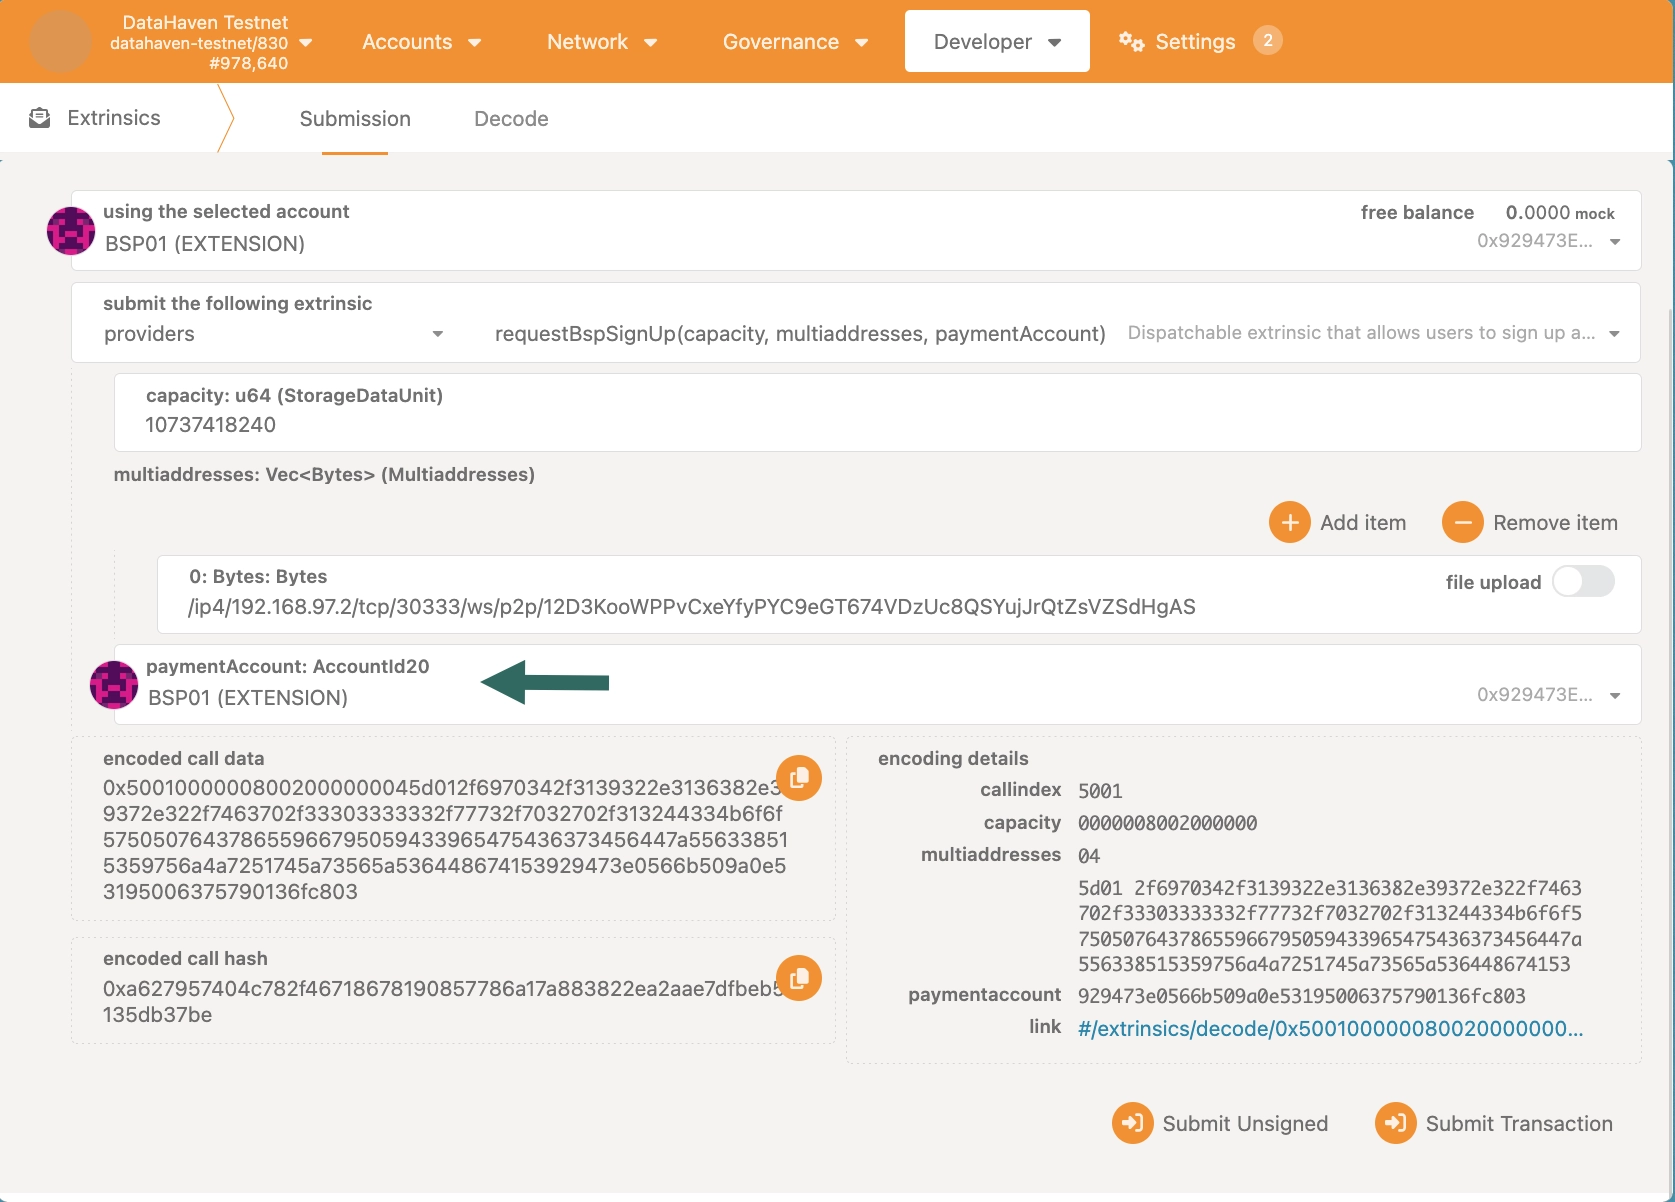
Add your BSP node's multiaddress into the
multiaddressesfield. You can find it in the logs of your BSP node as shown in the Run a BSP Node guide.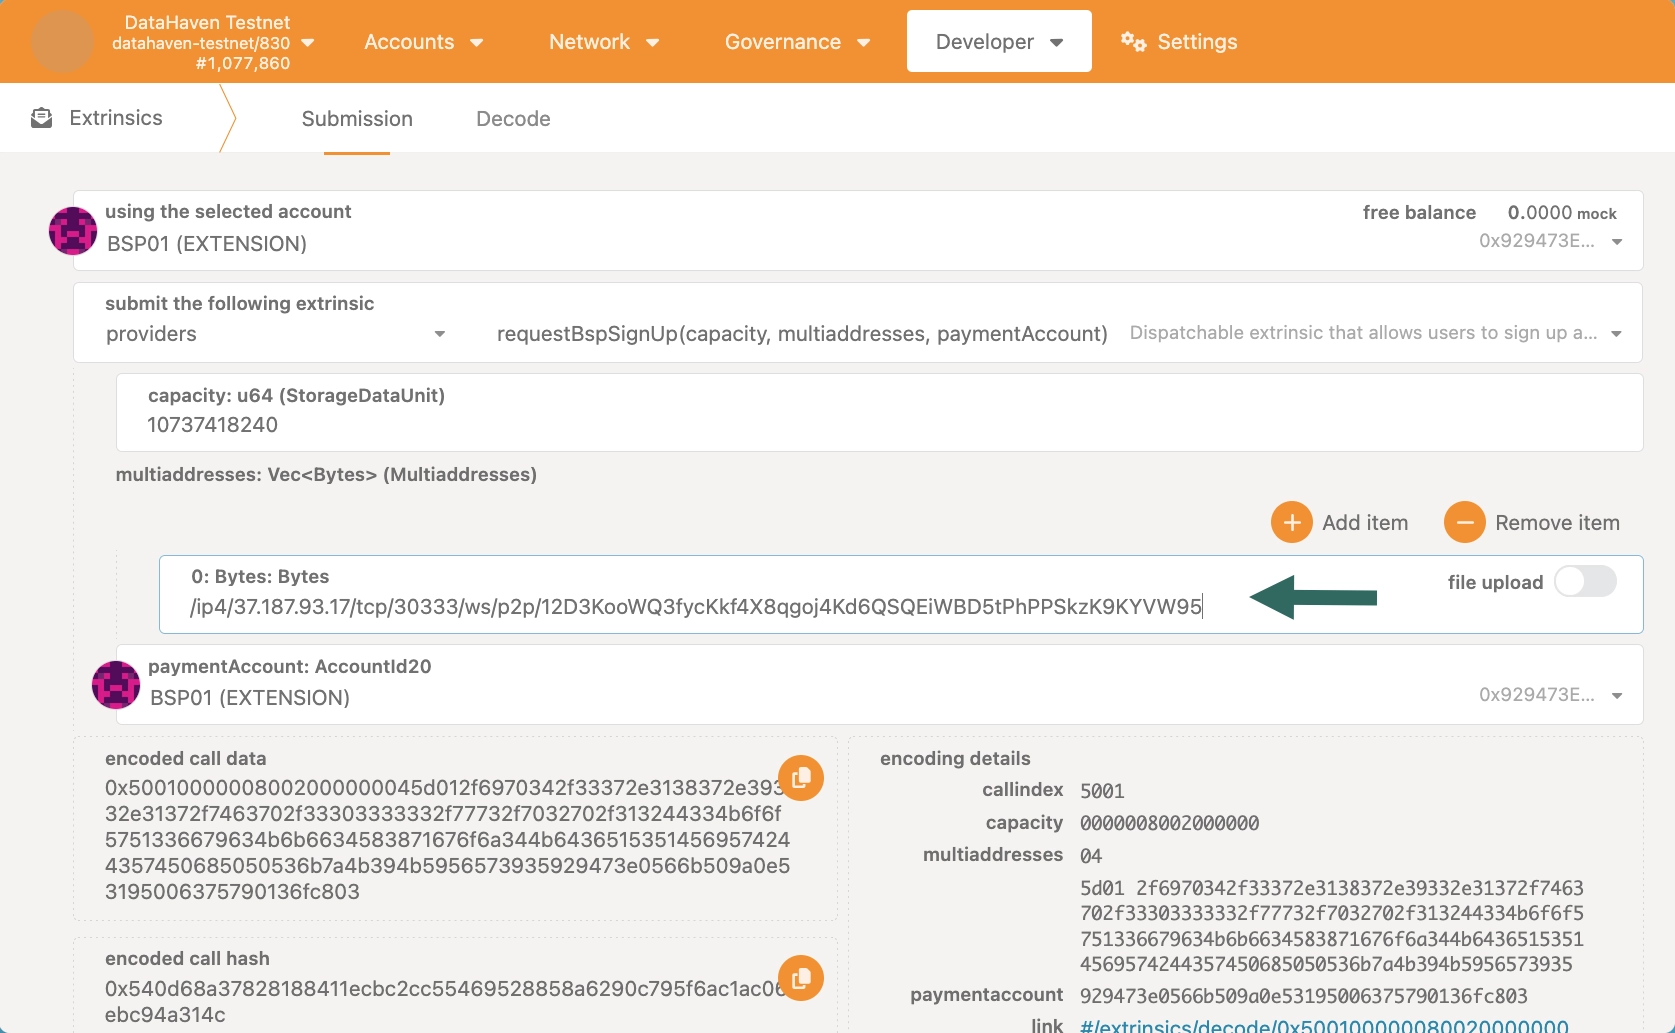
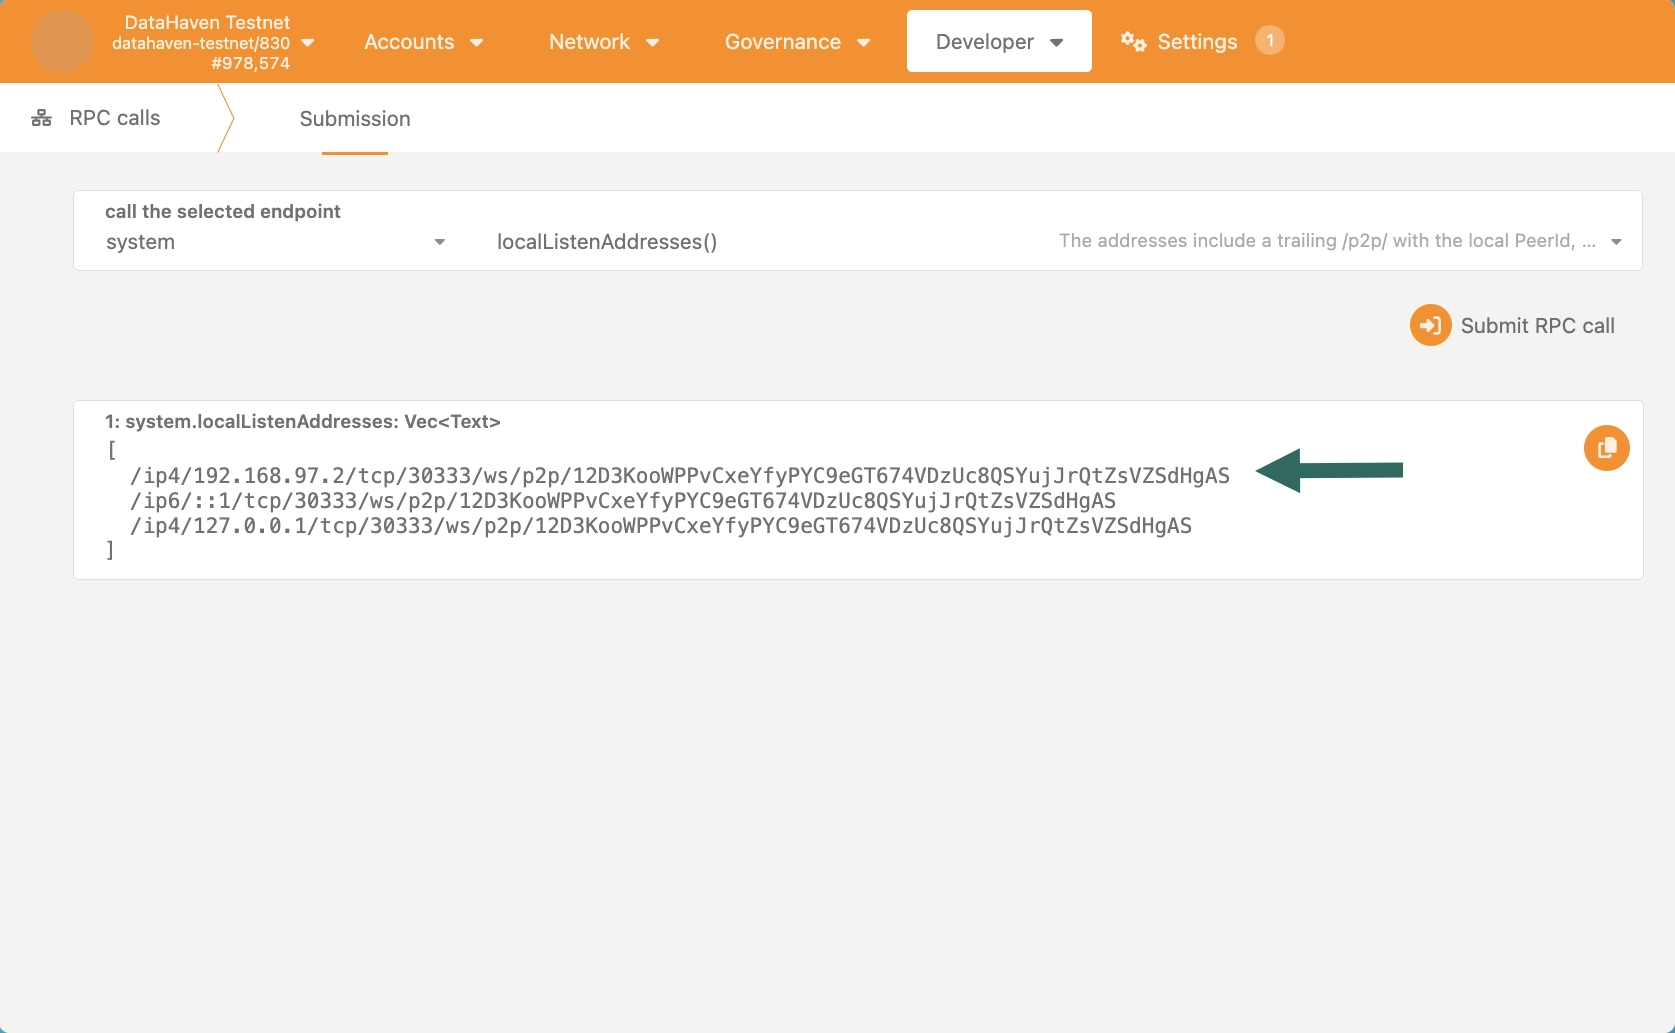
How can I find the multiaddress of my locally ran BSP node?
In order to find the correct multiaddress, within the Developer section, go to the RPC calls page and submit the
system.localListenAddressesRPC call. Out of the provided list, you should copy the multiaddress that doesn't contain neither127.0.0.1nor::1, but the one with the actual IP address such as192.168.97.2.This will only work if you are using the WebSocket endpoint of your locally ran BSP node.
-
Choose a public address on which you want to receive BSP rewards.
-
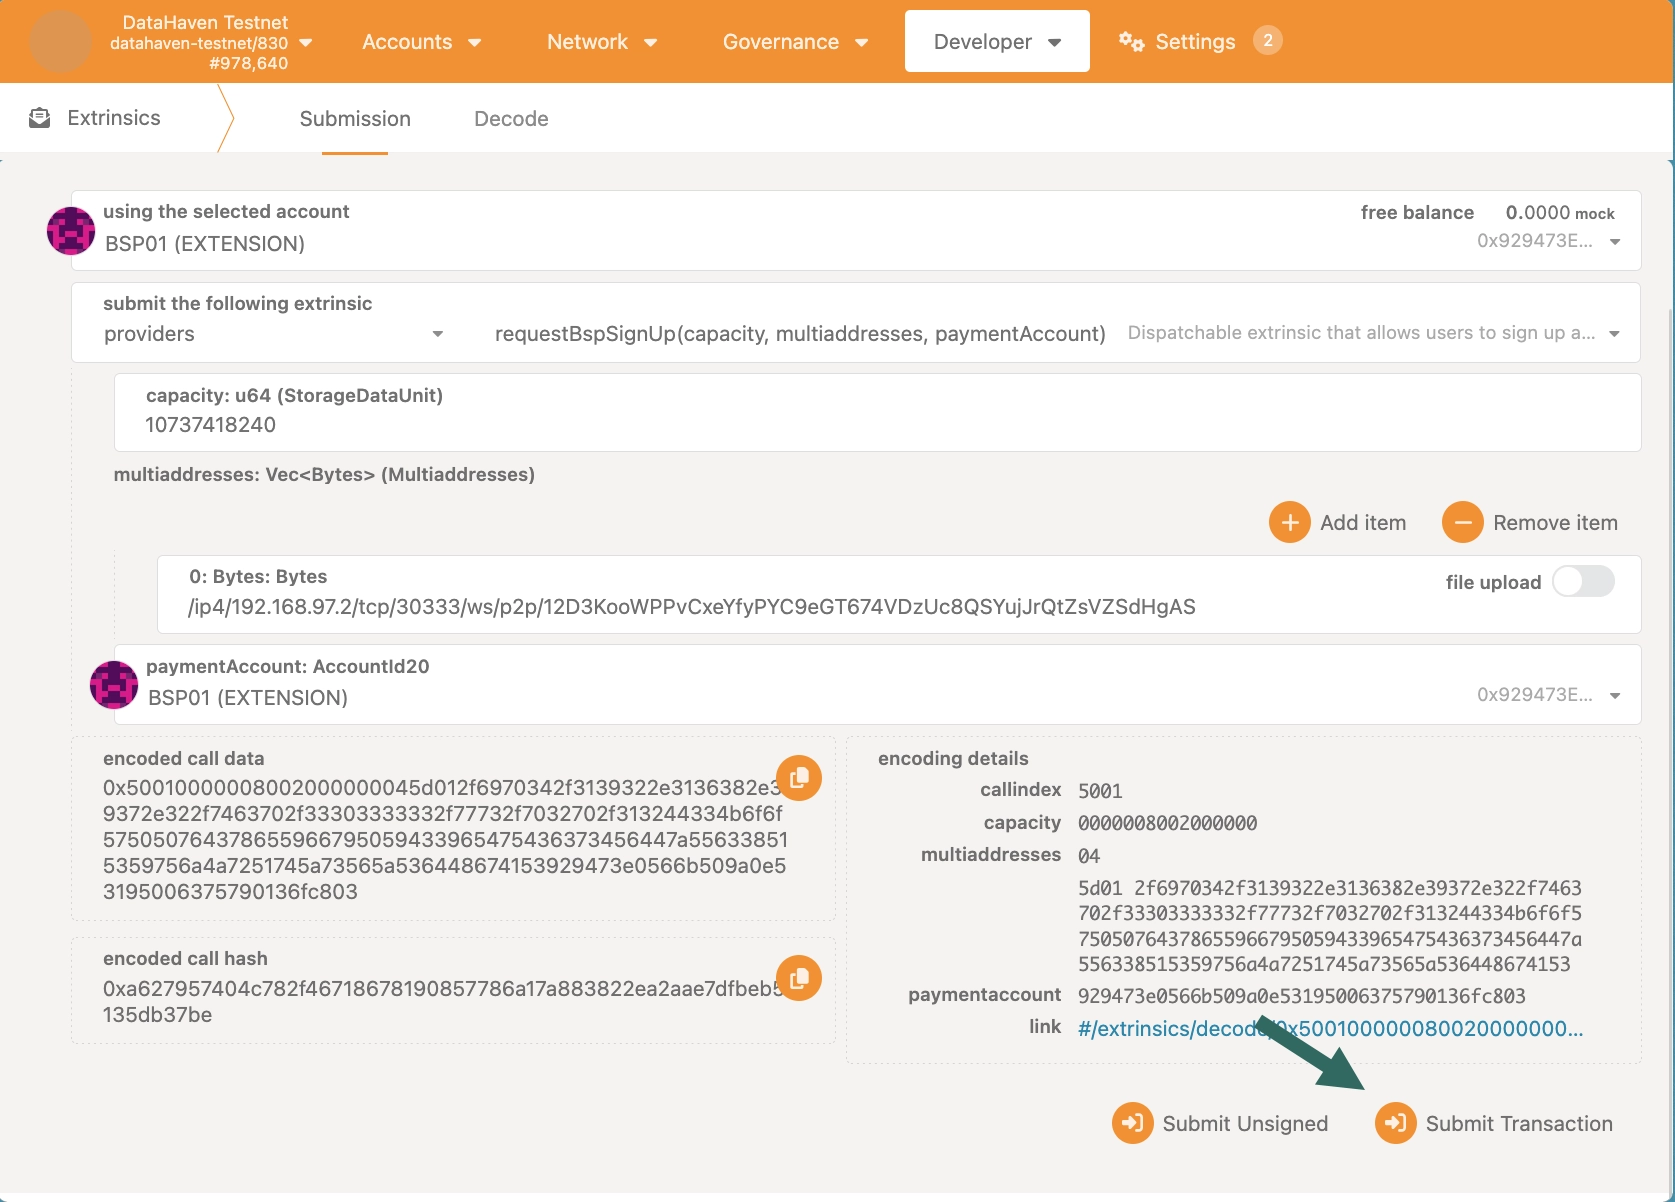
Submit transaction.
Confirm BSP Sign Up
Confirm your BSP registration after the required waiting period has passed. You should only trigger the confirmBspSignUp method after a new epoch has begun. An epoch lasts 1 hour.
-
Check if a new epoch has begun on Polkadot. js Apps' Explorer page.

-
Go to the Extrinsics page, and select the
providers.confirmSignUpextrinsic.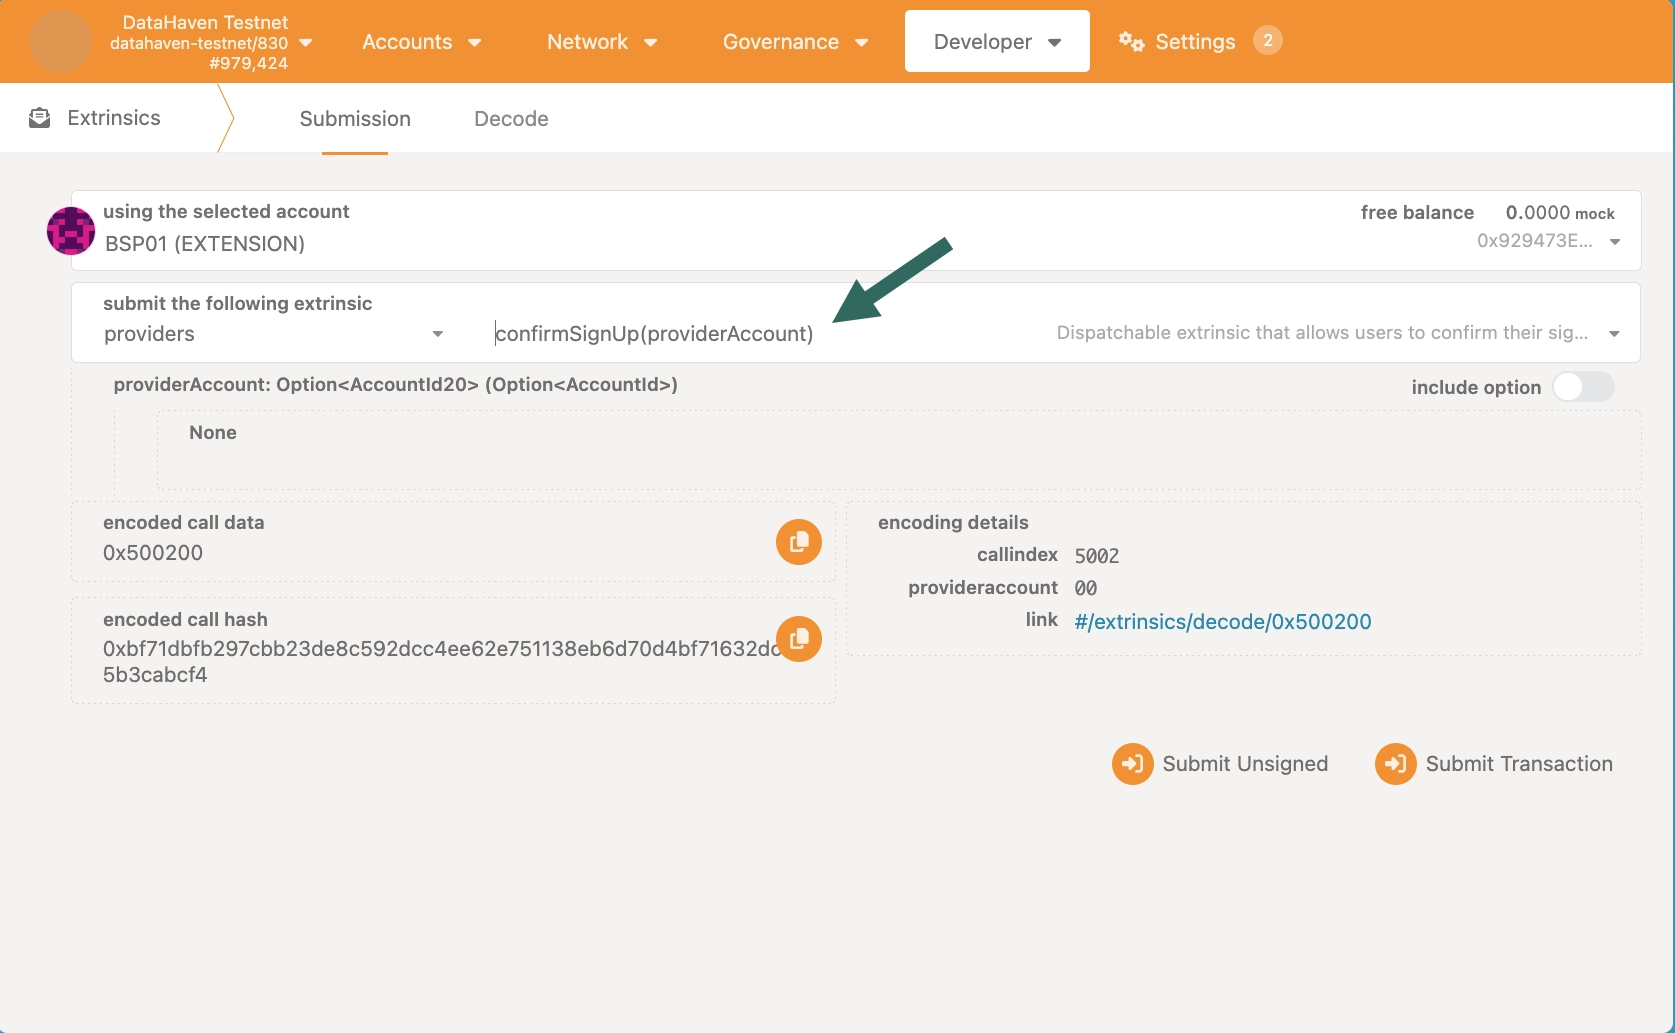
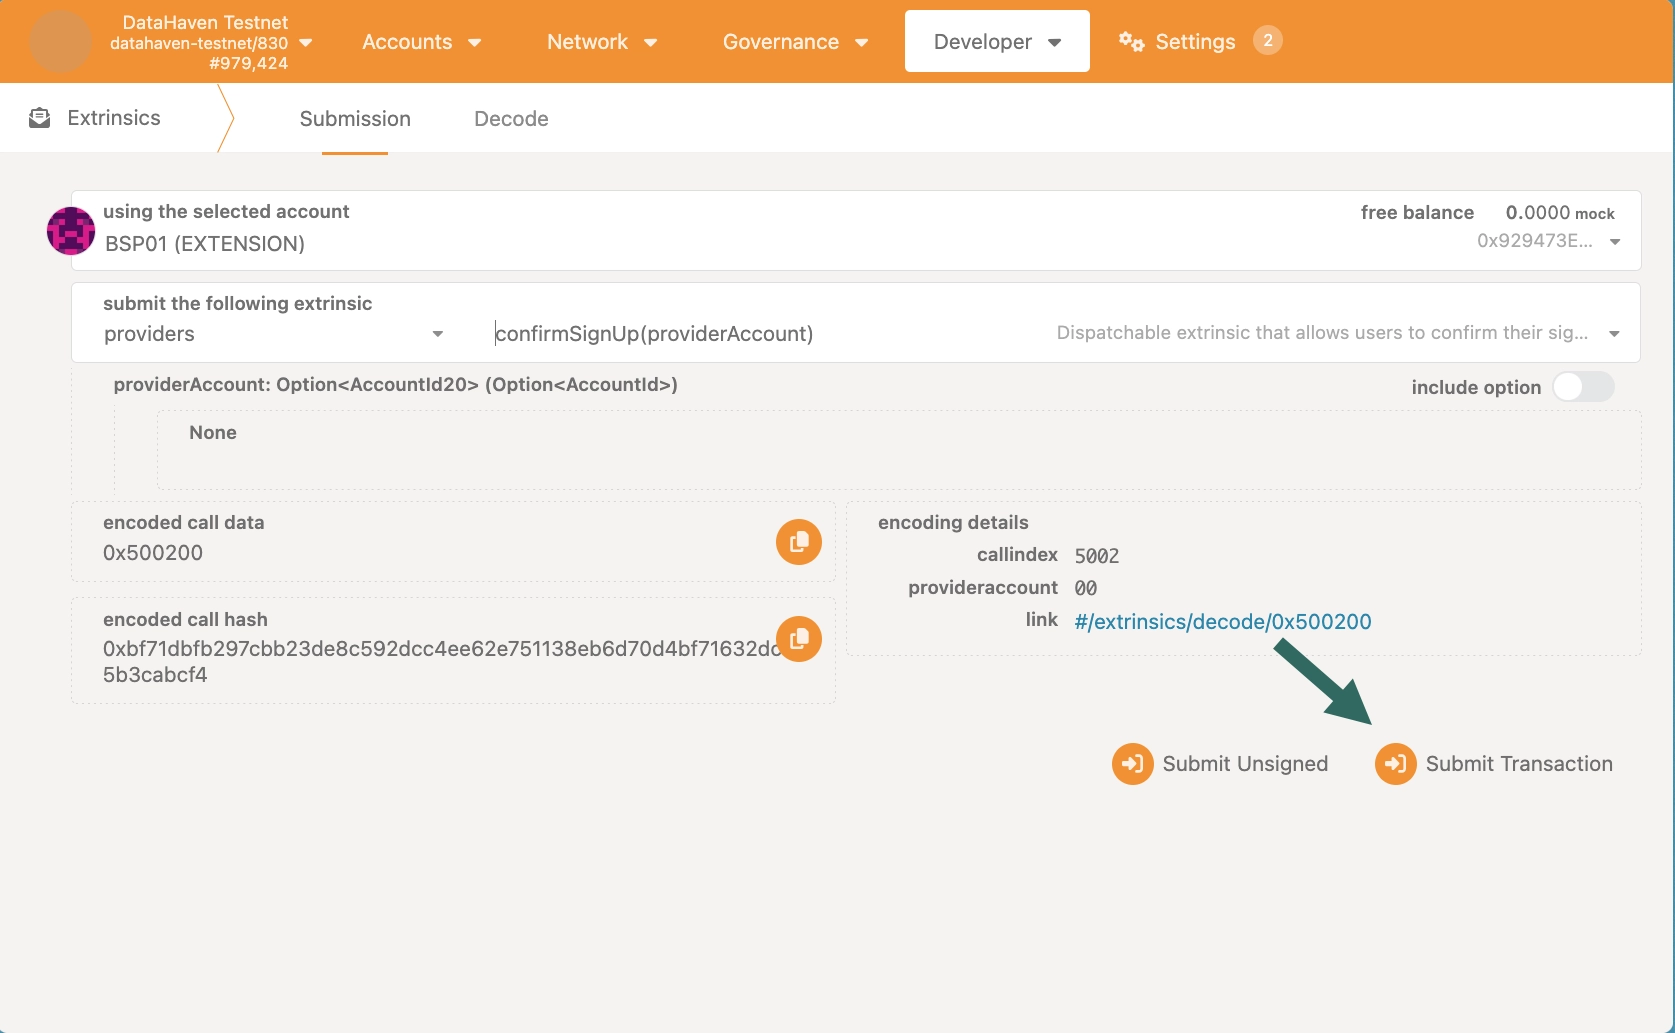
-
Submit transaction.
Next Steps
| Created: January 14, 2026